
Dental implants are one of the most effective and long-lasting solutions for replacing missing teeth. But before deciding to move forward with an implant procedure, most patients wonder one thing — does their insurance help cover the cost? When it comes to MetLife implant coverage, understanding how the plan works, what’s included, and how to get the maximum reimbursement can make a huge difference in your total expenses 💰.
MetLife is one of the largest dental insurance providers in the United States, offering a wide range of dental plans that include varying levels of implant coverage. However, not all MetLife plans automatically cover dental implants, and the specific benefits depend on whether you have a PPO, DHMO, or employer-based plan. The term MetLife implant coverage generally refers to how MetLife reimburses or pays for the surgical placement, abutment, and crown portion of the dental implant procedure. These three components — the implant post, abutment, and prosthetic tooth — may each have different coverage levels under your policy.
To truly understand your MetLife dental insurance for implants, you should start by reviewing your plan’s Summary of Benefits and Coverage (SBC). This document outlines which services are categorized as “major,” “basic,” or “preventive.” In most MetLife dental plans, implants fall under “major restorative services,” which typically have a lower reimbursement percentage than preventive or basic care. For example, preventive care such as cleanings may be covered at 100%, basic care like fillings at 80%, and major care — including implants — at around 50% after the deductible has been met.
Let’s break down what that means in practice. Suppose your dental implant procedure costs $3,000 for a single tooth. If your MetLife plan covers major services at 50%, and you’ve already met your deductible, the insurer would pay $1,500, leaving you responsible for the remaining $1,500. However, this calculation can vary depending on your annual maximum, which is the total amount MetLife will pay for all dental services in a given year. Many MetLife dental plans have an annual maximum between $1,000 and $2,500. Once you reach that limit, any additional costs are entirely out of pocket.
One of the most important aspects of MetLife implant coverage is the waiting period. Some plans require you to maintain active coverage for 6 to 12 months before you become eligible for implant-related procedures. This policy is designed to prevent new enrollees from signing up solely to cover expensive procedures. Therefore, if you are considering implants in the near future, it’s wise to check your plan’s waiting period to avoid unpleasant surprises ⏳.
Another critical detail involves network status. MetLife offers both PDP (Preferred Dentist Program) and PDP Plus networks. Visiting an in-network provider can save you up to 30% or more on your total implant costs compared to going out of network. Additionally, many MetLife-participating dentists handle preauthorization and billing directly, simplifying the process for patients. If you’re unsure about your provider’s status, you can confirm it directly on MetLife’s official website or through the Redent Klinik Contact Page to get professional guidance about implant treatment options abroad 🌍.
It’s also important to remember that dental implants are often not purely cosmetic — they can be medically necessary. MetLife considers coverage for implants more favorably when tooth loss results from trauma, disease, or extraction of a non-restorable tooth rather than purely aesthetic enhancement. When you submit a claim, ensure that your dentist provides all supporting documentation, such as X-rays, treatment notes, and diagnostic details. These details can significantly improve your chances of receiving maximum reimbursement from your MetLife implant coverage.
MetLife also offers optional riders or enhanced plans for people who anticipate the need for advanced dental treatments. These upgraded policies may have higher annual maximums and broader coverage for restorative procedures, including implants, bridges, and crowns. You can check with your employer or directly with MetLife customer service to see whether such an option is available in your region. For patients undergoing full-mouth reconstruction or multiple implants, these enhanced plans can save thousands of dollars in long-term costs.
In summary, MetLife implant coverage varies depending on your specific dental plan, network provider, and eligibility conditions. Understanding the distinctions between surgical and restorative coverage, checking your annual maximum, and confirming your waiting period are crucial steps. MetLife remains one of the more flexible insurers when it comes to implant procedures — especially for policyholders with comprehensive or PPO Plus coverage. If you want to learn more about implant materials, safety standards, or best practices, the American Dental Association offers excellent educational resources backed by clinical research 🦷.
Ultimately, knowing the ins and outs of your MetLife plan helps you make informed decisions about your dental health and budget. With the right understanding and preparation, you can turn a seemingly expensive implant procedure into a smart long-term investment in your oral health and confidence 😁.
Understanding MetLife Dental Insurance Plans for Implants
When exploring MetLife implant coverage, the first step is to understand how MetLife structures its dental insurance plans and how implants fit into these categories. Dental insurance isn’t one-size-fits-all; coverage depends on your specific plan, employer benefits, and whether you choose a PPO or DHMO network. MetLife provides one of the most flexible dental benefit systems in the United States, allowing millions of members to customize their dental care experience. For patients considering implants, understanding these plan distinctions is essential to avoid unexpected costs or coverage denials 💡.
1. The Core Structure of MetLife Dental Plans
MetLife primarily offers three types of dental insurance plans that influence implant coverage: PPO (Preferred Provider Organization), DHMO (Dental Health Maintenance Organization), and MetLife TakeAlong Dental. Each has unique coverage terms, flexibility, and reimbursement models.
The PPO plan is the most common and provides the broadest coverage for implants. Under a PPO, you can visit any licensed dentist, though in-network providers deliver the best value. Typically, PPO plans cover preventive services at 100%, basic care (like fillings) at 80%, and major services — including implants — at about 50%. The DHMO plan, on the other hand, operates under a more restrictive model. You must select a primary care dentist from MetLife’s network, and specialist referrals are required for implant procedures. DHMO plans often have lower premiums but limited implant benefits.
MetLife’s TakeAlong Dental plan caters to individuals who want portable coverage — perfect for freelancers, retirees, or anyone not covered through an employer. Depending on the level (Basic, Medium, or High), implant benefits may vary. In most cases, only the “High” level includes partial reimbursement for implant-related services. Therefore, before scheduling an implant consultation, it’s vital to verify which plan tier you hold and whether MetLife implant coverage applies to surgical and restorative stages.
2. How Implants Fit into MetLife’s Benefit Categories
In MetLife’s dental terminology, services are divided into three major categories: preventive, basic, and major restorative. Dental implants are classified as major restorative services because they involve complex surgery and custom prosthetics. This classification significantly affects your out-of-pocket cost and reimbursement rate. Most MetLife plans pay 40% to 60% of the implant procedure after meeting the deductible, but some premium plans can go up to 80% depending on the network and policy year.
✔ Preventive vs. Major Restorative Care
Preventive care — such as cleanings and exams — is fully covered, while restorative treatments like implants require coinsurance. This means you share the cost with the insurer. So, if your implant procedure costs $4,000 and your coinsurance rate is 50%, MetLife covers $2,000 while you pay the remaining $2,000. The exact percentage depends on your employer plan’s negotiated rates and annual maximum limit. Understanding this cost-sharing structure ensures you can budget accurately and avoid financial surprises.
3. Annual Maximums and Deductibles Explained
Every MetLife dental plan includes an annual maximum — the total amount the insurer will pay in a calendar year. For most members, this ranges between $1,000 and $2,500. Once you reach that limit, you’re responsible for any additional costs. Since dental implants can easily exceed $3,000 per tooth, it’s important to plan your treatment timeline strategically. For example, if you need multiple implants, consider splitting the procedures across two benefit years to maximize reimbursement.
Another key element of MetLife implant coverage is the deductible — the amount you must pay before insurance starts contributing. Deductibles usually range from $50 to $150 per person per year. Meeting your deductible early allows you to unlock your benefits faster, ensuring higher cost efficiency if you plan major treatments later in the year.
4. Preauthorization and Network Advantages
Many patients overlook the importance of preauthorization when it comes to MetLife implant coverage. Before undergoing surgery, it’s wise to ask your dentist to submit a “pre-treatment estimate.” MetLife will review your treatment plan and confirm how much of the cost will be covered. This prevents billing confusion and gives you a clear estimate of your out-of-pocket expenses.
Additionally, choosing an in-network dentist can save you 20–40% compared to out-of-network providers. MetLife negotiates discounted rates with network professionals, meaning the total billed amount for implant placement and crown restoration is often significantly lower. You can use MetLife’s online “Find a Dentist” tool or reach out to Redent Klinik Contact Page to find certified clinics familiar with MetLife billing standards and documentation requirements 🏥.
5. Understanding Limitations and Waiting Periods
Like most dental insurers, MetLife imposes specific limitations to control costs and prevent misuse. Typical restrictions include:
- A waiting period of 6–12 months before implant coverage begins.
- Exclusions for pre-existing missing teeth unless covered under a “Missing Tooth Clause.”
- Limitations on the number of implants covered per jaw.
- Annual or lifetime maximums per implant site.
For example, if you lost a tooth before obtaining your MetLife policy, the missing tooth clause may prevent reimbursement for that replacement. However, some employer-based plans waive this restriction, so it’s always worth confirming with MetLife customer service.
6. Implant-Related Services Often Covered Separately
MetLife implant coverage doesn’t always mean the entire procedure is paid for under a single benefit. The coverage is often split across categories:
- Implant placement (surgery): Usually covered as a major restorative service.
- Abutment and crown: Sometimes processed separately under prosthetic coverage.
- Bone grafts or sinus lifts: May not be covered unless medically necessary and preapproved.
This separation can affect how much you pay overall. For example, MetLife might reimburse the implant post but not the accompanying bone graft. That’s why verifying coverage line by line in your benefit summary is crucial. MetLife’s claims department or your dental office’s insurance coordinator can help clarify these technicalities.
7. Using MetLife Resources for Smarter Decisions
MetLife provides online tools like the “MyBenefits Portal” where policyholders can check their implant coverage, claim status, and payment breakdown. This platform helps patients estimate treatment costs in advance, schedule appointments with in-network specialists, and track annual maximums in real time. For detailed educational materials about dental implants and oral health standards, the American Dental Association remains the most authoritative resource available online 📚.
In conclusion, understanding how MetLife implant coverage works under various dental plans ensures that patients make financially sound and health-conscious choices. Reviewing your benefits summary, confirming network status, and requesting preauthorization before treatment can save thousands of dollars. By staying proactive, you’ll transform your dental implant journey into a smoother, more predictable experience that supports both your smile and your wallet 😄.
Does MetLife Cover Dental Implants in 2025?
As dental implant procedures continue to gain popularity, more patients are turning to their insurance providers to determine what is covered. When it comes to MetLife implant coverage in 2025, the answer is generally yes — but with important conditions and limits. MetLife recognizes dental implants as a legitimate restorative treatment, not just a cosmetic one, and many of its modern plans include partial reimbursement for implant-related expenses. However, the extent of this coverage depends heavily on your specific plan, the type of procedure, and whether your dentist is part of the MetLife network 🦷.
1. The 2025 Update: Expanded Implant Coverage Options
Over the past few years, MetLife has broadened its dental benefits to include more implant-related procedures. As of 2025, the company has revised several of its PPO and TakeAlong Dental plans to support greater flexibility for members seeking implants. Many policyholders who previously had no implant benefits under their plans can now receive up to 50–70% coverage for qualified implant procedures after meeting their deductible. This improvement aligns with MetLife’s effort to stay competitive in the insurance market as implants have become the gold standard for permanent tooth replacement.
For example, under the MetLife PDP Plus network, members can now enjoy broader surgical benefits that include implant placement, abutment connection, and even certain types of bone grafting when medically necessary. While full coverage is rare, these additions make MetLife implant coverage far more appealing to patients planning restorative or reconstructive dental work in 2025.
2. How Coverage Is Applied to the Implant Procedure
Dental implant treatment generally consists of three phases: the surgical placement of the titanium post, the attachment of the abutment, and the installation of the prosthetic crown. MetLife processes each stage separately when determining coverage. This means one part of the treatment may fall under “surgical coverage,” while another may be classified as “prosthetic.”
✔ Surgical Placement Phase
In this phase, MetLife usually classifies the placement of the implant post as a major restorative service. Depending on your plan, 40%–60% of the cost may be reimbursed after the deductible. The key here is that your dentist must be in-network and provide accurate procedural codes (D6010 for implant placement) to ensure proper processing.
✔ Abutment and Crown Restoration
Once the implant integrates with your jawbone, an abutment and crown are added. These parts are often billed under prosthetic coverage, not surgical coverage. For patients with PPO Plus or enhanced TakeAlong plans, MetLife implant coverage often includes 50% reimbursement for the abutment and crown, though some basic plans may exclude them entirely. Understanding this distinction can save you from unexpected out-of-pocket expenses 💡.
3. Plan Types That Include Implant Coverage
Not all MetLife dental plans cover implants equally. Below is a breakdown of the main categories of plans that may include implant-related benefits in 2025:
- MetLife PPO Plans: Offer the highest flexibility and implant coverage, with reimbursement ranging between 40% and 70% after deductibles.
- MetLife DHMO Plans: More restrictive and may exclude implants altogether. When included, coverage typically applies only to specific restorative components.
- MetLife Federal Dental Plans (FEDVIP): Often favored by government employees, these include enhanced implant coverage with no waiting periods for most services.
- TakeAlong Dental Plans: Portable plans ideal for freelancers or retirees. The “High” tier usually provides implant coverage, while the “Low” tier may not.
If you are unsure which plan you have, log in to your MetLife MyBenefits account or contact your HR department. The plan’s “Summary of Benefits and Coverage” (SBC) will outline whether implants are included, and under which category of care. This is the best way to confirm whether your MetLife implant coverage applies to your planned treatment.
4. Understanding Annual Maximums and Waiting Periods
Even if your MetLife plan includes implant coverage, you must consider two key financial constraints — annual maximums and waiting periods. Most plans cap annual benefits between $1,000 and $2,500 per year. Once this limit is reached, MetLife will not pay for additional procedures until your policy renews. For patients needing multiple implants, this means you may want to schedule treatments across two calendar years to maximize benefits and minimize out-of-pocket costs.
Waiting periods are also common. Many MetLife policies require a 6–12 month active enrollment before you become eligible for implant-related services. This rule helps the insurer manage costs and discourage individuals from signing up only to undergo expensive treatments immediately.
5. Factors That Influence Coverage Approval
While MetLife aims to make implant coverage accessible, approval still depends on certain conditions:
- The missing tooth must have occurred after your policy’s effective date.
- The implant must be deemed medically necessary, not purely cosmetic.
- Supporting documentation such as X-rays, diagnostic images, and treatment plans must be submitted with your claim.
MetLife also evaluates the clinical justification of each procedure. For example, if a bridge or denture could achieve similar results, MetLife may limit reimbursement. However, for cases involving bone loss, trauma, or severe decay, MetLife implant coverage tends to be more generous.
6. What’s Not Covered in 2025
Despite improvements in 2025, certain services remain excluded from MetLife’s standard implant coverage. These may include:
- Bone grafting unrelated to implant support
- Temporary or provisional crowns
- Cosmetic enhancements like zirconia upgrades beyond standard crown materials
- Implant-supported dentures (in some basic plans)
It’s important to read your plan’s fine print. Even if an item isn’t covered by default, you can sometimes appeal a claim with proper documentation from your dentist.
7. How to Confirm Coverage Before Treatment
Before scheduling your implant surgery, always request a “pre-treatment estimate” from MetLife. This process allows the insurer to review your treatment plan and inform you of how much they will cover. It’s the most reliable way to confirm your MetLife implant coverage before committing to a high-cost dental procedure.
Additionally, your provider can help verify coverage and billing codes. Clinics like Redent Klinik Contact Page can guide patients through insurance coordination, ensuring the claim submission meets MetLife’s documentation requirements. This minimizes the risk of claim rejection or delayed reimbursement.
8. Why MetLife Implant Coverage Stands Out in 2025
Compared to many other dental insurance companies, MetLife’s implant coverage is among the most progressive in 2025. Its PPO and TakeAlong plans now offer multi-stage reimbursement, competitive annual maximums, and access to an extensive provider network. Combined with flexible deductible structures and simplified online claim tracking, MetLife implant coverage has become one of the most patient-friendly options in the market.
For further guidance about dental implant procedures and oral health standards, you can visit the American Dental Association, a trusted authority on dental care practices in the U.S. Their information aligns closely with MetLife’s approach to evidence-based treatment and patient safety 🏥.
In summary, MetLife’s 2025 policies provide broader implant coverage than ever before. While not every plan includes full benefits, the insurer’s flexibility and transparency make it easier for patients to understand their options, plan financially, and confidently move forward with dental implant procedures designed to restore both function and aesthetics 😁.
Eligibility Criteria for MetLife Implant Coverage
Before moving forward with a dental implant treatment, it’s essential to determine whether you qualify for MetLife implant coverage. MetLife evaluates eligibility based on several factors — including your plan type, dental history, enrollment duration, and the medical necessity of the procedure. Understanding these criteria can help you avoid claim denials and maximize the benefits available under your dental insurance policy 🦷.
1. General Eligibility Requirements for Implant Coverage
MetLife dental insurance plans categorize implant procedures as major restorative services. Therefore, eligibility for MetLife implant coverage depends on meeting several baseline conditions. First, you must be an active policyholder at the time of the implant surgery. Second, your policy must explicitly include coverage for implants under the “major services” category. Lastly, the tooth loss that led to the implant procedure should have occurred after your policy’s effective date — otherwise, your claim might be affected by the “missing tooth clause.”
The missing tooth clause is a common limitation across dental insurance providers. It excludes coverage for teeth lost before you obtained insurance. However, certain MetLife employer-sponsored or premium plans waive this clause. Always confirm this detail in your plan’s Summary of Benefits and Coverage (SBC) before scheduling your treatment. If this clause applies, you could be responsible for the full cost of your dental implant despite being insured.
2. Length of Enrollment and Waiting Periods
Most MetLife plans require you to maintain continuous coverage for a set period before becoming eligible for implant reimbursement. The typical waiting period ranges from 6 to 12 months. This rule helps prevent short-term enrollments solely aimed at covering expensive dental work. For example, if your MetLife dental policy started in January 2025 and includes a 12-month waiting period, you wouldn’t be eligible for MetLife implant coverage until January 2026.
Some employer-based group plans waive waiting periods entirely, especially for employees who had prior dental coverage without a lapse. If you are switching from another provider to MetLife, ask about “credit for prior coverage.” This feature can shorten or eliminate your waiting period, allowing you to access implant benefits sooner ⏳.
3. Medical Necessity and Documentation Requirements
Even if your policy includes implant coverage, MetLife will only approve reimbursement when the procedure is considered medically necessary. Cosmetic motivations alone typically do not qualify. Instead, you must demonstrate that the implant restores chewing function, prevents bone loss, or replaces a non-restorable tooth. To support this, your dentist must submit diagnostic X-rays, clinical notes, and a comprehensive treatment plan during the preauthorization process.
📋 Documentation Checklist for MetLife Approval
- Recent panoramic or periapical X-rays of the affected area
- Notes from your dentist describing bone density and tooth condition
- A detailed cost estimate, including CDT codes for each procedure (e.g., D6010 for implant placement, D6065 for abutment)
- Signed treatment consent forms (if applicable)
Providing complete and accurate documentation increases your approval rate significantly. It’s also a good idea to have your dentist submit a pre-treatment estimate before the actual surgery. This allows MetLife to confirm which portions of your MetLife implant coverage apply, helping you budget confidently.
4. Type of Tooth Loss and Cause
MetLife differentiates between accidental, disease-related, and pre-existing tooth loss. Implants due to trauma or medical conditions (like severe decay or periodontal disease) are more likely to be covered than those done for cosmetic purposes. If your tooth loss resulted from an accident, MetLife may also process part of the claim under accident coverage, further reducing your out-of-pocket cost. However, elective tooth extractions followed by implants often receive lower reimbursement unless medically justified.
For example, if you had a tooth extraction due to a severe infection, MetLife might approve partial coverage for both the extraction and implant placement. On the other hand, if you chose to remove a healthy tooth for alignment reasons, coverage may not apply. Understanding these nuances ensures you prepare strong documentation for approval 💡.
5. Plan Type and Network Participation
Your eligibility for MetLife implant coverage also depends on your plan type and whether your dentist is in-network. PPO and TakeAlong plans generally provide implant benefits with flexible provider choices. DHMO plans, however, often limit eligibility to specific network providers and may require referrals to specialists. Visiting an in-network dentist ensures you benefit from reduced rates and smoother claim processing.
To confirm your eligibility and network status, log into your MyBenefits portal or consult MetLife’s online “Find a Dentist” tool. Alternatively, you can reach out to the Redent Klinik Contact Page for expert help navigating the insurance process and understanding international coverage options 🌍.
6. Exclusions That Affect Eligibility
Despite having implant coverage, certain exclusions can make you ineligible for reimbursement. These may include:
- Implants placed to improve aesthetics without functional need
- Procedures not preauthorized by MetLife
- Implant-supported dentures in basic plans
- Experimental or unapproved implant materials
- Bone grafting not related to implant stability
MetLife routinely reviews each claim for compliance with clinical guidelines. If the treatment deviates from standard care protocols — for instance, using an experimental implant type — coverage may be denied. Therefore, ensure your dentist follows American Dental Association standards for implant procedures. This not only increases approval chances but also ensures your safety during the process.
7. Preauthorization and Claim Review Timeline
Once your dentist submits all required documentation, MetLife typically takes 10–15 business days to process a preauthorization request. During this period, the insurer evaluates medical necessity, plan eligibility, and coding accuracy. If approved, you’ll receive an estimate detailing how much MetLife will pay toward each phase of your implant treatment.
After the treatment is complete, the provider submits a final claim for reimbursement. Most claims are processed within 30 days. Keeping copies of all communications, invoices, and X-rays helps in case a claim needs review or correction.
8. How to Improve Your Chances of Approval
To enhance your likelihood of securing MetLife implant coverage, follow these best practices:
- Ensure continuous coverage without lapses between insurance periods.
- Have your dentist verify coding and documentation before submission.
- Submit a pre-treatment estimate for all major restorative procedures.
- Choose a MetLife in-network specialist familiar with implant billing.
- Keep detailed records of communication with both your dentist and insurer.
9. Summary: Who Qualifies for MetLife Implant Coverage?
In short, you qualify for MetLife implant coverage if:
- Your dental plan includes implant benefits under major restorative services.
- You have maintained active enrollment long enough to meet any waiting period.
- The implant procedure is medically necessary, not elective.
- All required documentation and X-rays are submitted correctly.
- You use an in-network provider or meet the plan’s referral requirements.
Meeting these eligibility conditions ensures that your claim is processed efficiently and fairly. By understanding the full scope of your policy, you can confidently plan your implant treatment, knowing what costs will be covered and what portion you’ll need to pay yourself. This proactive approach transforms the often-confusing insurance process into a predictable and financially manageable experience 🏥.
What Is the Average Out-of-Pocket Cost with MetLife?
One of the most common questions patients ask before getting dental implants is: “How much will I have to pay after MetLife implant coverage?” While insurance helps reduce the cost significantly, dental implants remain one of the more expensive dental treatments available. Understanding the cost breakdown, reimbursement structure, and potential savings is essential for making informed financial decisions. Let’s examine how MetLife calculates implant costs and what you can realistically expect to pay in 2025 💰.
1. The Typical Cost of Dental Implants Before Insurance
Before applying insurance coverage, a single dental implant in the United States typically costs between $3,000 and $5,000. This amount includes three main components — the implant post (the titanium root), the abutment (the connector), and the crown (the visible prosthetic tooth). In some cases, additional procedures such as bone grafting or sinus lifts may increase the total cost by another $800–$2,500 per site.
It’s important to note that the total cost can vary depending on geographic location, materials used, and your dentist’s experience. For example, a zirconia crown may cost more than a porcelain-fused-to-metal crown. MetLife does not set prices directly but negotiates discounts with in-network providers. Therefore, the first step in estimating your out-of-pocket cost is to determine whether your chosen dentist participates in MetLife’s PDP or PDP Plus network.
2. How MetLife Calculates Implant Reimbursement
MetLife implant coverage is structured around reimbursement percentages for “major restorative services.” Most plans reimburse between 40% and 60% of the allowable fee after the deductible has been met. For instance, if your plan covers 50% of major services and your dentist’s negotiated implant fee is $4,000, MetLife would pay $2,000, leaving you responsible for the other $2,000.
✔ Example Calculation
Let’s consider a typical case:
- Implant placement: $2,000
- Abutment and crown: $1,500
- Bone graft (if needed): $500
Total cost: $4,000. If your plan’s major services are covered at 50%, and you’ve already met your $100 deductible, MetLife would reimburse $1,950 ($4,000 – $100 deductible = $3,900 × 50%). You would pay the remaining $2,050 out of pocket. However, if your plan has a $2,000 annual maximum and you’ve already used $500 for other dental work, your reimbursement would be capped at $1,500, slightly increasing your personal cost.
3. Factors That Affect Out-of-Pocket Expenses
Your out-of-pocket expenses under MetLife implant coverage depend on several key factors:
- Plan type: PPO and TakeAlong High-tier plans offer higher reimbursement rates than DHMO or Low-tier plans.
- Network status: In-network providers agree to reduced rates, lowering total treatment costs by up to 30%.
- Annual maximum: Most MetLife dental plans have yearly caps between $1,000 and $2,500.
- Waiting period: If a waiting period applies and you proceed with treatment early, coverage will not apply.
- Type of implant: Traditional single implants are usually covered, while mini implants or full-arch restorations may not be fully reimbursed.
4. Comparing Costs: In-Network vs. Out-of-Network Dentists
Patients who choose in-network MetLife dentists enjoy significant savings. Because MetLife negotiates discounted fees, you’re charged a lower “allowed amount,” and your coinsurance is based on this reduced rate. Conversely, if you visit an out-of-network dentist, you’re billed the provider’s full fee and must pay the difference between their rate and MetLife’s allowance — a process known as “balance billing.”
✔ Example Comparison
In-network total implant cost: $3,600 → MetLife pays $1,800 (50%) → You pay $1,800.
Out-of-network total implant cost: $4,200 → MetLife still pays $1,800 → You pay $2,400.
The $600 difference highlights why staying in-network is the most effective way to reduce expenses under your MetLife implant coverage 🏥.
5. Average Costs by Plan Type (2025 Estimates)
| Plan Type | Annual Maximum | Coinsurance (Major Services) | Approx. Out-of-Pocket (Single Implant) |
|---|---|---|---|
| PPO Plus | $2,500 | 50–70% | $1,200–$1,800 |
| Standard PPO | $1,500 | 50% | $1,800–$2,300 |
| DHMO | N/A (Fixed Copay) | Limited | $2,000–$2,800 |
| TakeAlong Dental High | $2,000 | 60% | $1,500–$2,000 |
These estimates are based on 2025 plan averages and represent national cost ranges. Regional variations may apply. Always verify your plan’s specifics in the “Summary of Benefits and Coverage.”
6. Additional Expenses Not Always Covered
Some implant-related costs are excluded from standard MetLife implant coverage. These include:
- Advanced bone grafting or sinus lift procedures unless medically necessary
- Temporary crowns or healing abutments
- Soft tissue grafts or cosmetic gum contouring
- 3D CT scans for surgical planning (sometimes partially reimbursed)
- Implant-supported overdentures (only covered in select PPO plans)
While these items increase total costs, you can minimize expenses by choosing in-network providers who offer bundled implant packages. Many clinics offer all-inclusive pricing that integrates both the surgical and prosthetic phases at a reduced rate.
7. Financial Planning Tips to Reduce Out-of-Pocket Costs
To manage costs effectively under MetLife implant coverage, consider these strategies:
- Request a pre-treatment estimate before surgery to see how much MetLife will pay.
- Time your treatment across two calendar years to maximize annual maximums.
- Use pre-tax funds from a Health Savings Account (HSA) or Flexible Spending Account (FSA) to pay your portion.
- Ask your dentist about phased treatment — spreading surgical and prosthetic work over separate benefit periods.
- Confirm whether your plan covers diagnostic imaging (X-rays, scans) in addition to the implant procedure itself.
Some international dental clinics also offer competitive pricing that can reduce overall costs even after travel expenses. You can contact the Redent Klinik Contact Page for expert advice on combining MetLife coverage with affordable implant options abroad 🌍.
8. Why Out-of-Pocket Estimates Matter
Getting an accurate estimate before treatment prevents financial surprises. MetLife allows both patients and dental offices to request a “predetermination of benefits.” This document outlines exactly what MetLife will pay for each procedure code, including the implant, abutment, and crown. Submitting this form helps ensure that your MetLife implant coverage is applied correctly and that you know your share of the costs ahead of time.
9. Final Thoughts: Balancing Cost and Value
While dental implants can be costly, they are a long-term investment in oral health, function, and aesthetics. Compared to bridges or dentures, implants last longer, prevent jawbone loss, and offer better comfort and stability. Even with partial reimbursement, MetLife implant coverage makes the procedure more affordable for thousands of patients each year. For those needing more guidance on dental standards and cost expectations, the American Dental Association provides reliable information on best practices and average fee data across the U.S.
Ultimately, your total cost depends on your plan’s coverage tier, deductible, and network participation. By taking time to understand your policy and request pre-treatment estimates, you can ensure a smoother, more predictable financial experience — and enjoy the lasting benefits of a confident, healthy smile 😁.
How to Maximize Your MetLife Implant Benefits
While having MetLife implant coverage is an excellent start, getting the full value from your insurance requires strategy, timing, and a bit of insider knowledge. Many policyholders unknowingly lose hundreds—or even thousands—of dollars each year simply because they don’t use their benefits correctly. By understanding how MetLife calculates reimbursements, applying for pre-treatment estimates, and structuring your procedures efficiently, you can maximize your insurance payout and minimize out-of-pocket costs 💡.
1. Start with a Detailed Benefit Review
The first step toward optimizing MetLife implant coverage is understanding your policy inside and out. Every plan—whether PPO, DHMO, or TakeAlong—includes unique limits, waiting periods, and eligible services. Log into your MyBenefits portal or review your plan’s Summary of Benefits and Coverage (SBC). Focus on these three sections:
- Major Restorative Services: Check if implants, abutments, and crowns fall under this category.
- Annual Maximum: Identify your yearly spending cap—typically $1,000–$2,500.
- Coinsurance Rate: Note what percentage MetLife covers for major services (40%–70% in most PPO plans).
Once you have this information, calculate potential reimbursements. For instance, if your implant procedure costs $3,500 and MetLife covers 50%, you’ll get $1,750 reimbursed—assuming you haven’t reached your annual limit.
2. Use Pre-Treatment Estimates to Plan Ahead
MetLife allows policyholders to request a pre-treatment estimate before starting an implant procedure. This step is crucial for maximizing your benefit because it clarifies exactly what MetLife will pay and what your out-of-pocket portion will be. Your dentist submits X-rays, procedure codes, and a treatment plan to MetLife, and the insurer provides a written estimate within 10–15 business days.
✔ Why Preauthorization Helps
Preauthorization not only prevents surprise bills but also ensures your treatment aligns with policy rules. If there’s any missing documentation or code mismatch, you’ll know before surgery—giving you time to correct it. This proactive approach guarantees your MetLife implant coverage is applied correctly and promptly after treatment 🦷.
3. Time Your Procedures Strategically
Since most MetLife plans include an annual maximum, splitting your implant treatment across benefit years can double your reimbursement potential. For example, you can schedule the implant placement in December and the crown restoration in January of the next year. This approach uses benefits from two coverage periods, effectively doubling your available insurance funds.
This strategy is especially valuable for patients receiving multiple implants. With each procedure often exceeding $3,000, staggering them over two years ensures you get maximum reimbursement from MetLife implant coverage without exceeding the annual limit.
4. Choose an In-Network Provider
MetLife negotiates discounted rates with its in-network dentists, meaning you automatically pay less even before insurance kicks in. These providers follow the MetLife fee schedule and handle billing directly, making the claim process seamless.
✔ Example Savings
Let’s say the average out-of-network implant costs $4,200, while the in-network rate is $3,200. If your plan covers 50%, MetLife pays $1,600 for the in-network provider versus $1,600 for the out-of-network one—but the total cost difference means you save $1,000 instantly. This is one of the simplest ways to get more value out of your MetLife implant coverage without changing your treatment plan 🏥.
5. Leverage Health Savings Accounts (HSA) and FSAs
If your MetLife coverage doesn’t cover the entire implant procedure, you can use tax-advantaged savings accounts to pay the remainder. Both Health Savings Accounts (HSA) and Flexible Spending Accounts (FSA) allow you to use pre-tax money for eligible dental treatments, including implants. By combining these funds with MetLife implant coverage, you can reduce your effective costs by 20–30% through tax savings alone.
For example, if you owe $2,000 after insurance and use FSA funds, you effectively save around $400–$600 in taxes depending on your income bracket.
6. Understand Plan Exclusions and Avoid Common Mistakes
Many claim denials result from avoidable misunderstandings. Some patients assume all implant-related procedures are covered, but that’s not always the case. Common exclusions include:
- Implants placed for purely cosmetic purposes
- Procedures not preauthorized by MetLife
- Experimental or unapproved implant materials
- Bone grafting not directly related to implant placement
To avoid these pitfalls, have your dentist clearly document medical necessity and provide X-rays showing bone loss or missing teeth. Submitting this information with your pre-treatment estimate can significantly improve approval rates.
7. Combine Preventive Care with Restorative Treatment
MetLife rewards preventive care by covering checkups and cleanings at 100%. Regular dental visits not only maintain oral health but also improve eligibility for implant procedures. For instance, if your gums and bone are healthy, your dentist can proceed faster with fewer preparatory treatments. This reduces your total cost and maximizes the value of your MetLife implant coverage.
8. Request a Case Review for Denied Claims
If your claim is denied, don’t panic. MetLife allows members to file an appeal with supporting evidence. A successful appeal often requires updated diagnostic information, clinical photos, or letters of medical necessity. Many denied claims are later approved after clarification. Working closely with your dental office and referencing authoritative guidelines from the American Dental Association can strengthen your case.
9. Explore International Options for Cost Efficiency
Patients seeking affordable implant care abroad can use MetLife’s out-of-country claim submission process. Clinics such as Redent Klinik Contact Page provide high-quality treatments at competitive rates. While MetLife typically reimburses based on U.S. fee schedules, even partial reimbursement can make overseas treatment a cost-effective option 🌍.
10. Final Thoughts: Taking Full Advantage of MetLife Implant Coverage
Maximizing your MetLife implant coverage isn’t just about understanding percentages—it’s about smart planning. Reviewing your plan annually, staying in-network, splitting treatments across benefit periods, and submitting pre-treatment estimates are the most effective ways to reduce costs. Combining these tactics with HSA/FSA contributions and strong documentation ensures you receive the maximum possible reimbursement. By approaching your treatment strategically, you can transform a costly dental implant procedure into a well-managed, affordable investment in your long-term oral health and confidence 😁.
Comparing MetLife Implant Coverage with Other Insurance Providers
When planning for dental implants, understanding how your insurance compares with other providers can help you determine if you’re getting the best value. MetLife implant coverage has gained popularity for its flexibility and comprehensive structure, but it’s worth analyzing how it stands against competitors like Delta Dental, Cigna, Aetna, Guardian, and Humana. Each company offers unique advantages, coverage limitations, and reimbursement models. This section provides a detailed comparison so you can see exactly where MetLife excels — and where you might find alternatives that better fit your needs 🦷.
1. The Overall Landscape of Dental Implant Insurance
Dental implants are now considered a standard restorative treatment rather than a luxury. As a result, many insurers have updated their policies to include partial reimbursement for implant-related procedures. However, the percentage covered, annual maximums, and waiting periods can differ drastically. This variation means patients must carefully compare the fine print of each plan. Among these, MetLife implant coverage consistently ranks among the most accessible and transparent options for both individuals and employer-sponsored policyholders.
✔ Industry Trends in 2025
By 2025, most major dental insurance companies have shifted toward more inclusive implant coverage. Plans that once excluded implants entirely now reimburse between 40%–70% of eligible costs. This shift has largely been driven by patient demand and advancements in implant technology, which have made the procedure more reliable and medically justified.
2. MetLife vs. Delta Dental
Delta Dental is one of the largest competitors to MetLife and offers a variety of PPO and HMO options. Both companies provide implant coverage, but there are notable differences:
- Coverage Percentage: MetLife typically covers 40%–70% of implant-related services, while Delta Dental plans often range between 30%–60%.
- Annual Maximum: MetLife’s annual maximums usually range from $1,500–$2,500; Delta Dental’s tend to be lower, around $1,000–$1,500 for standard plans.
- Waiting Periods: MetLife offers shorter waiting periods (6–12 months) compared to Delta’s standard 12-month requirement.
- Network Flexibility: MetLife’s PDP Plus network provides broader nationwide access, while Delta’s network is strong but more regionally divided.
In summary, MetLife generally provides more flexibility and higher reimbursement rates for implant procedures, especially for policyholders in its PPO Plus network. Patients benefit from greater coverage predictability, a key advantage of MetLife implant coverage.
3. MetLife vs. Cigna
Cigna Dental plans are known for affordable premiums and preventive care, but their implant coverage can be limited depending on plan level. Most Cigna PPO plans reimburse 40%–50% for implants after the deductible, while MetLife’s comparable PPO plans offer up to 70% reimbursement on premium tiers.
✔ Notable Differences
- Cigna often excludes bone grafting unless explicitly medically necessary, while MetLife considers it under the implant preparation phase.
- Cigna’s network is smaller than MetLife’s PDP Plus, which can lead to higher out-of-pocket expenses if you need to go out of network.
- MetLife’s claim processing time (10–15 business days) tends to be faster than Cigna’s average of 20–30 days.
Therefore, for patients who want faster approvals and broader network access, MetLife implant coverage generally provides a smoother and more predictable experience than Cigna.
4. MetLife vs. Aetna
Aetna Dental plans are widely respected for preventive care but less generous with major restorative services like implants. Most Aetna PPO policies cap implant reimbursement at 40%–50%, while MetLife can go as high as 70% under some employer-based plans. Moreover, Aetna often enforces a two-year waiting period for major services, whereas MetLife’s average waiting period is only six months to one year.
Aetna does, however, have a slightly higher lifetime maximum in some plans ($3,000–$5,000), which can be beneficial for patients needing multiple implants. Still, for most individuals seeking single or dual implants, MetLife implant coverage is more cost-efficient and flexible.
5. MetLife vs. Guardian
Guardian Dental provides solid implant coverage but focuses on long-term members with premium plans. Guardian’s reimbursement rates often mirror MetLife’s, but Guardian policies tend to require longer membership periods before full eligibility.
One key difference is that Guardian has stricter “missing tooth” exclusions, meaning if you lost a tooth before enrolling, you may not receive coverage for that implant. MetLife, on the other hand, is more lenient — many of its group policies waive the missing tooth clause, allowing new members to qualify for implant coverage sooner 🏥.
6. MetLife vs. Humana
Humana is another major competitor offering affordable dental plans. However, its implant coverage is often limited to premium PPO plans. Humana typically covers around 40%–50% of implant costs, with an annual maximum between $1,000 and $1,500. Additionally, Humana’s waiting periods can stretch up to 18 months, which can delay treatment for new policyholders.
By comparison, MetLife implant coverage offers faster access, higher coverage percentages, and wider acceptance among dental providers. For individuals seeking immediate treatment, MetLife’s shorter waiting period and broader provider base give it a clear advantage.
7. Cost Comparison Summary Table
| Insurance Provider | Implant Coverage Range | Annual Maximum | Waiting Period | Network Size |
|---|---|---|---|---|
| MetLife | 40%–70% | $1,500–$2,500 | 6–12 months | Extensive (PDP Plus) |
| Delta Dental | 30%–60% | $1,000–$1,500 | 12 months | Moderate |
| Cigna | 40%–50% | $1,000–$2,000 | 12 months | Moderate |
| Aetna | 40%–50% | $2,000–$5,000 | 24 months | Moderate |
| Guardian | 40%–60% | $1,500–$2,500 | 12 months | Wide |
| Humana | 40%–50% | $1,000–$1,500 | 12–18 months | Limited |
8. Patient Experience and Claim Support
Another area where MetLife outperforms competitors is customer service and claims support. MetLife’s MyBenefits portal allows real-time claim tracking, preauthorization submission, and easy documentation upload. Its claim approval time averages 10–15 business days — faster than the industry average. Cigna and Aetna, in comparison, may take up to 30 days for similar claims.
Additionally, MetLife’s dedicated dental customer service line offers personalized assistance for claim issues, while competitors often use generalized call centers. This emphasis on convenience and transparency makes MetLife implant coverage particularly attractive to busy professionals or families managing multiple dental claims.
9. Final Verdict: Why MetLife Leads the Market
When compared side-by-side, MetLife consistently ranks among the top insurers for dental implant coverage. It offers competitive reimbursement rates, short waiting periods, and extensive provider networks—all key elements patients look for in a dependable dental plan. Furthermore, its streamlined digital claim tools and preauthorization system reduce administrative headaches and speed up reimbursements.
For patients seeking professional guidance or treatment abroad, Redent Klinik Contact Page can assist in coordinating MetLife-related documentation for international dental care. For detailed clinical guidelines and policy standards, the American Dental Association remains the most reliable resource for implant-related best practices 🌍.
In conclusion, MetLife implant coverage offers one of the best balances between affordability, flexibility, and reliability in today’s dental insurance market. Whether you’re considering implants for one tooth or full-arch restoration, MetLife provides the most well-rounded benefits for both short-term cost control and long-term oral health investment 😁.
Step-by-Step Guide to Claiming MetLife Implant Coverage
Filing a dental insurance claim can be intimidating, especially for complex procedures like dental implants. However, the process for claiming MetLife implant coverage is straightforward if you know what steps to follow and what documents to prepare. MetLife’s streamlined claim process ensures that both patients and dental providers can easily submit claims, verify eligibility, and receive reimbursement promptly. Below is a complete, step-by-step explanation to help you navigate the claim process efficiently and maximize your insurance benefits 🦷.
1. Confirm Eligibility and Coverage Details
The first and most critical step in using MetLife implant coverage is confirming that your plan includes implant benefits. Not all MetLife plans automatically cover implants, so review your policy or log into your MyBenefits portal to check the details. Look specifically for these factors:
- Implants listed under “Major Restorative Services” in your benefits summary.
- Annual maximum limits (typically $1,000–$2,500).
- Coinsurance rate (usually 40%–70%).
- Waiting period requirements (often 6–12 months).
- Missing tooth clause and medical necessity conditions.
Understanding these components upfront prevents claim denials later. If you’re unsure about your plan specifics, contact MetLife’s customer support or ask your dental provider to verify benefits before proceeding with treatment.
2. Schedule a Consultation and Obtain a Treatment Plan
Next, book a consultation with a MetLife-participating dentist or oral surgeon. During the visit, your dentist will conduct X-rays, CT scans, or diagnostic evaluations to determine your suitability for implants. Once the evaluation is complete, your provider will prepare a detailed treatment plan outlining the procedure codes (CDT codes), estimated costs, and timeline for the surgery and restoration phases.
This treatment plan is vital for the next step — the pre-treatment estimate, which ensures your MetLife implant coverage applies correctly before you begin the procedure 💡.
3. Submit a Pre-Treatment Estimate
MetLife allows both patients and dental offices to submit a pre-treatment estimate (sometimes called preauthorization). This step helps you know in advance how much MetLife will cover and what your portion will be. Your dentist will send MetLife the following information:
- CDT procedure codes (e.g., D6010 for implant placement, D6057 for abutment).
- Radiographic images or panoramic X-rays.
- Clinical notes explaining medical necessity.
- Full cost breakdown for each implant-related service.
Once submitted, MetLife typically processes the estimate within 10–15 business days. You’ll then receive an official document stating what amount is covered and what you are responsible for paying. Having this information ensures there are no billing surprises when your implant procedure is complete ✅.
4. Complete the Dental Implant Procedure
After receiving your pre-treatment estimate, you can proceed with the implant placement. The treatment usually involves multiple stages — surgical insertion, healing period, abutment attachment, and crown placement. Throughout these stages, ensure your dentist records each service date, code, and cost accurately. Each phase can be billed separately, and accurate documentation is essential for smooth processing under MetLife implant coverage.
✔ Pro Tip: Keep Detailed Records
Ask your dental provider for itemized receipts and copies of X-rays after every phase. This will simplify reimbursement and make it easier to track your annual maximum usage. Documentation plays a major role in avoiding claim delays or denials later in the process.
5. Dentist Submits the Claim to MetLife
Most in-network providers handle the claim submission for you. However, if your dentist is out-of-network or you receive treatment abroad, you may need to submit the claim yourself. The submission can be done electronically (through the provider’s system) or manually via MetLife’s claim form. Here’s what’s typically required:
- Completed MetLife Dental Claim Form (available on the MetLife website).
- Itemized bill from your dentist including CDT codes.
- Proof of payment (if you’ve paid upfront).
- Supporting documentation (X-rays, treatment notes, or medical necessity letter).
If submitting manually, mail all documents to the address listed on your MetLife plan’s claim form. Be sure to keep copies for your records.
6. Track Your Claim and Review Explanation of Benefits (EOB)
Once MetLife receives your claim, you can track its progress through the MyBenefits online portal. Most claims are processed within 15–30 business days. After processing, you’ll receive an Explanation of Benefits (EOB) statement detailing:
- Services billed by the provider
- Amounts covered by MetLife
- Patient’s share (copay, deductible, or balance)
- Remaining annual maximum
Review the EOB carefully to ensure all procedures are listed correctly. If you notice discrepancies or missing services, contact MetLife immediately to initiate a review. This ensures your MetLife implant coverage is applied correctly for every phase of your implant treatment.
7. Handle Partial Payments and Reimbursements
If your dentist charged you upfront, MetLife will send the reimbursement directly to you once the claim is approved. For in-network providers, payment usually goes straight to the dental office. Keep in mind that MetLife’s reimbursement depends on your coinsurance rate, deductible status, and annual limit. Any amount above these limits becomes your responsibility.
✔ Example Reimbursement Scenario
Suppose your implant procedure totals $4,000. Your plan covers 50% for major restorative services, and your deductible is $100. After meeting the deductible, MetLife reimburses $1,950, and you pay $2,050 out of pocket. Understanding these figures helps you budget more effectively under your MetLife implant coverage.
8. Appealing a Denied Claim
Sometimes, claims may be denied due to missing documentation, plan limitations, or clerical errors. If this happens, you have the right to appeal. Submit an appeal letter within 60 days of receiving your EOB, including any additional X-rays, treatment notes, or letters of medical necessity from your dentist. MetLife will re-evaluate the claim and respond within 30 days. Many appeals succeed once proper justification is provided 📝.
9. Getting Help from MetLife and Your Dentist
Throughout the process, both your provider and MetLife representatives can help clarify details. Your dental office’s insurance coordinator can verify coding accuracy, while MetLife customer service can confirm whether a specific procedure is eligible under MetLife implant coverage. For international cases, you can also seek support from Redent Klinik Contact Page, which assists patients in submitting claims for treatments performed outside the U.S.
10. Final Thoughts: A Smooth Path to Reimbursement
Filing for MetLife implant coverage doesn’t have to be complicated. By confirming eligibility, securing pre-treatment approval, and submitting accurate documentation, you can ensure timely and full reimbursement. Keep copies of all correspondence, check your MyBenefits portal regularly, and follow up promptly if issues arise. MetLife’s efficient digital tools and transparent process make it one of the most user-friendly dental insurers available. For additional information on standard dental claim procedures and implant-related coding, consult the American Dental Association’s guidelines, which align closely with MetLife’s policy framework.
With the right preparation and understanding, your insurance can work for you — not against you. This proactive approach ensures you receive the maximum benefit possible and helps make your dental implant journey financially stress-free and predictable 😁.
Common Reasons MetLife Denies Implant Claims
Even with a solid insurance plan, claim denials can still occur — and dental implant procedures are among the most frequently challenged. Understanding why MetLife implant coverage might be denied is essential for preventing delays, appeals, and financial surprises. In most cases, denials result from simple documentation errors, policy misunderstandings, or unmet eligibility requirements. This guide breaks down every major reason claims get denied and provides actionable tips to ensure your coverage is approved quickly and smoothly 🦷.
1. Lack of Pre-Treatment Estimate or Authorization
One of the most common reasons for denial under MetLife implant coverage is failing to submit a pre-treatment estimate. MetLife requires documentation before approving expensive or complex dental procedures, especially implants. If your provider begins treatment without preauthorization, MetLife may reject or delay the claim.
✔ How to Avoid This Problem
Always ensure your dentist submits a pre-treatment estimate, including diagnostic X-rays, clinical notes, and detailed cost breakdowns. Once MetLife reviews and approves this information, you’ll receive a written confirmation that clearly outlines what portion will be covered and what you will owe out of pocket. This confirmation serves as your financial safeguard before starting treatment.
2. Missing or Incorrect CDT Procedure Codes
Every dental claim must include accurate CDT (Current Dental Terminology) procedure codes. If the codes are incorrect or incomplete, MetLife’s system cannot match them to eligible benefits. This leads to automatic denial.
- Example: Using D6058 (abutment-supported porcelain crown) when D6057 (custom abutment) applies can trigger a claim rejection.
- Tip: Ask your dentist to double-check the coding against the official ADA CDT Code List to ensure all procedures under MetLife implant coverage are filed correctly.
MetLife typically requires the following CDT codes for implant claims:
- D6010 – Surgical placement of implant body
- D6056 – Prefabricated abutment
- D6058 – Abutment-supported porcelain crown
- D7953 – Bone graft (if applicable)
Accurate coding is one of the easiest ways to avoid delays or denials.
3. The “Missing Tooth Clause” Exclusion
Some MetLife plans include a “missing tooth clause”, which excludes coverage for teeth lost before your insurance took effect. This clause is a common reason why first-time implant claims are denied. For example, if you lost a tooth five years ago and only recently enrolled in MetLife, your implant may be considered pre-existing and therefore not eligible for reimbursement.
✔ How to Overcome the Missing Tooth Clause
Some MetLife group plans — especially employer-sponsored PPO Plus plans — waive this exclusion. Always confirm whether your plan includes a missing tooth clause before treatment. If it does, you can appeal the denial by proving that the extraction or bone loss occurred after your coverage began. Radiographic evidence and dental records can support your appeal successfully.
4. Lack of Medical Necessity Documentation
MetLife implant coverage is typically provided for medically necessary procedures rather than purely cosmetic ones. If your claim does not clearly state a medical reason (e.g., bone resorption, functional bite issues, or inability to wear dentures), it might be denied for lack of medical necessity.
To prevent this, ask your dentist to include clinical notes explaining why the implant is necessary to restore function, prevent bone loss, or stabilize an existing prosthesis. Supporting X-rays, 3D scans, and periodontal reports strengthen your case and significantly reduce the risk of denial 🩺.
5. Exceeding Annual Maximum or Frequency Limits
MetLife plans set annual maximum benefits — typically between $1,000 and $2,500 — and may also restrict how often certain procedures are covered. For instance, if you’ve already used part of your annual limit for crowns or fillings, there may be insufficient balance left for your implant claim. Similarly, some plans only allow one implant per tooth lifetime, even if an earlier one fails.
✔ Smart Timing Tip
Plan your implant treatment strategically. Schedule the implant placement near the end of one benefit year and the crown placement in the next year. This allows you to utilize two annual maximums under MetLife implant coverage instead of one, effectively doubling your available reimbursement limit 💡.
6. Out-of-Network Provider Issues
If you receive treatment from a dentist who isn’t part of MetLife’s PDP or PDP Plus network, your claim might be subject to reduced reimbursement or partial denial. Out-of-network claims are often processed based on “reasonable and customary” fees, which may be lower than your provider’s actual charges. This can leave you responsible for the balance.
✔ Solution
Always choose in-network providers to maximize your benefits and avoid “balance billing.” MetLife’s Find a Dentist tool lists approved clinics in your area. In-network providers follow pre-negotiated rates, ensuring your MetLife implant coverage applies fully and efficiently.
7. Waiting Period Not Met
Many MetLife dental plans require a waiting period of 6–12 months before major restorative services, including implants, become eligible. If you undergo treatment before this period expires, the claim will be denied — even if implants are listed as covered benefits.
Check your plan’s effective date carefully and consult your provider about timing. If you’re nearing the end of your waiting period, postponing treatment by a few weeks could make the difference between full coverage and complete denial.
8. Incomplete Claim Documentation
Insufficient documentation remains a leading cause of claim denials. If your dentist submits incomplete records, missing radiographs, or unclear treatment notes, MetLife may reject the claim until all data is provided.
✔ Best Practices
- Include panoramic X-rays, intraoral images, and 3D scans.
- Attach the full treatment plan with itemized codes and costs.
- Provide proof of prior extractions or bone grafting when applicable.
- Retain copies of all submitted forms and correspondence.
Following these steps ensures a smoother approval process for your MetLife implant coverage and avoids costly administrative delays.
9. Duplicate Billing or Incorrect Submission
Sometimes claims are denied simply because they were submitted twice or filed under the wrong provider’s name. This usually happens when both the surgical specialist and restorative dentist bill for the same tooth without coordination. MetLife’s system flags these duplicates as potential errors.
To prevent this, ensure your implant surgeon and restorative dentist communicate clearly about who will handle each billing code. This coordination guarantees the correct allocation of benefits between both providers under your MetLife implant coverage.
10. How to Appeal a Denied Claim
If your implant claim is denied, don’t panic. MetLife allows patients to appeal within 60 days of receiving their Explanation of Benefits (EOB). Prepare a written appeal letter that includes:
- Claim number and policy information
- Reason for appeal
- Supporting documentation (X-rays, clinical notes, proof of payment)
- Statement from your dentist explaining medical necessity
Mail or upload your appeal to MetLife’s online portal. They typically review and respond within 30 days. Many denied claims are successfully reversed when proper documentation is added 📄.
11. When to Seek Help
If you continue to face challenges, contact MetLife’s dedicated dental customer service team for guidance. Alternatively, you can reach out to your provider’s billing coordinator or an insurance advocate at your dental clinic. For patients receiving treatment abroad, Redent Klinik Contact Page offers expert support in claim preparation and documentation submission.
12. Final Thoughts: Preventing Denials Before They Happen
Most claim rejections are preventable with proactive planning and thorough communication. Submitting pre-treatment estimates, using correct CDT codes, confirming eligibility, and maintaining complete documentation ensure smooth processing of your MetLife implant coverage. By understanding common pitfalls and applying the right strategies, you can protect your benefits and enjoy a stress-free implant experience. For official claim and coding standards, refer to the American Dental Association’s guidelines — a trusted resource for both patients and dental professionals 🏥.
By staying informed, organized, and proactive, you’ll not only avoid unnecessary denials but also ensure that your investment in a healthy smile receives the maximum support your insurance plan offers 😁.
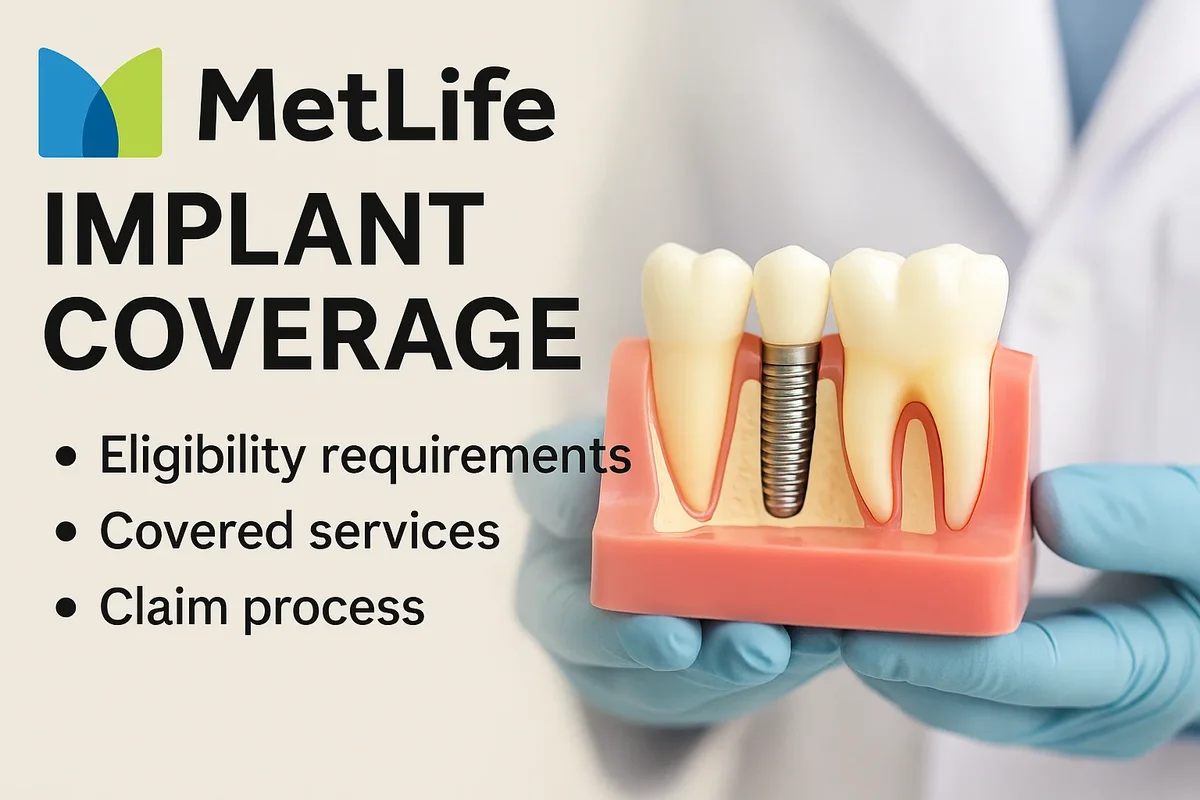
Tips for Choosing the Right Dentist for MetLife Implant Procedures
Selecting the right dentist plays a crucial role in ensuring the success of your implant procedure — both medically and financially. Even with comprehensive MetLife implant coverage, outcomes vary depending on the provider’s expertise, equipment quality, and familiarity with MetLife’s billing and claim process. Choosing a skilled, experienced, and insurance-compatible dentist not only guarantees high-quality results but also maximizes your coverage benefits and reduces unexpected expenses 🦷.
1. Verify Network Participation
The first and most essential step is confirming whether your dentist is part of MetLife’s PDP or PDP Plus network. Only in-network providers offer negotiated rates and direct claim submissions, which significantly lower your out-of-pocket costs. Out-of-network dentists can charge standard fees that exceed MetLife’s allowable amounts, leaving you to pay the difference.
✔ How to Check Network Status
- Visit the official MetLife Find a Dentist tool online.
- Filter by “Implant Dentistry” or “Prosthodontist.”
- Search by your ZIP code or city to locate the nearest in-network providers.
- Call the clinic to verify current participation, as network affiliations can change annually.
Working with in-network specialists ensures smoother claim handling, faster pre-treatment estimates, and greater predictability in how your MetLife implant coverage will apply to the procedure.
2. Evaluate the Dentist’s Implant Experience
Implant dentistry is both an art and a science. While many general dentists offer implant services, it’s best to choose a provider who has specialized training in oral surgery or prosthodontics. Experienced implant dentists can minimize complications, plan more precisely using digital imaging, and communicate effectively with MetLife’s documentation requirements.
✔ Key Credentials to Look For
- Membership in the American Dental Association or the Academy of Osseointegration.
- Postgraduate certification in implantology, oral surgery, or prosthodontics.
- Evidence of continuing education in implant technology and materials.
- Use of 3D cone-beam CT scans for pre-surgical planning.
These credentials reflect technical expertise and compliance with industry standards — two factors that strongly influence the long-term success of implants and the accuracy of your MetLife implant coverage claims.
3. Review the Dentist’s Claim Handling Expertise
Another often-overlooked factor is how well the clinic handles insurance paperwork. Implant claims are complex, involving multiple codes (e.g., D6010 for implant placement, D6057 for abutment, D6058 for crown). A provider who is familiar with MetLife’s claim process can ensure your procedures are billed correctly, avoiding unnecessary denials or delays.
✔ What to Ask Your Provider
- “Do you directly submit claims to MetLife, or will I need to file them?”
- “Can you provide a detailed pre-treatment estimate before I begin?”
- “Do you have experience handling MetLife implant cases?”
- “Can you help with appeals if a claim is denied?”
A well-organized office with a dedicated insurance coordinator can make the difference between smooth processing and months of back-and-forth communication with your insurer.
4. Compare Technology and Treatment Approach
Modern dental implant success rates exceed 95%, largely due to advances in technology. A clinic that uses digital imaging, guided surgery software, and high-quality implant materials not only improves surgical precision but also enhances documentation quality — a crucial factor when submitting claims under MetLife implant coverage.
✔ Essential Technologies to Look For
- 3D Cone-Beam CT Scanning: Offers accurate bone density mapping for better implant placement.
- Computer-Guided Surgery: Minimizes risk by allowing virtual planning before the operation.
- Intraoral Scanners: Provide precise digital impressions for crowns and abutments.
- Implant Brands: Reputable systems like Straumann, Nobel Biocare, and Zimmer Biomet often simplify claim approval.
Choosing a technologically advanced practice ensures efficient treatment and stronger documentation, helping you fully benefit from your MetLife implant coverage.
5. Discuss Financial and Payment Options
Even with robust insurance, some out-of-pocket costs may apply. A good dental office should clearly outline these expenses in advance. Ask about installment plans, in-house financing, or third-party options like CareCredit. Additionally, confirm whether they accept Health Savings Accounts (HSA) or Flexible Spending Accounts (FSA) payments, which can further reduce taxable income and increase savings.
Transparency in pricing builds trust and prevents unpleasant surprises later. Many clinics, including international options like Redent Klinik Contact Page, also provide all-inclusive implant packages that work seamlessly with MetLife implant coverage reimbursement.
6. Check Patient Reviews and Clinical Outcomes
Patient feedback offers valuable insights into both clinical expertise and customer service. Look for online reviews that specifically mention implant procedures and insurance interactions. Reliable platforms include Google Reviews, Healthgrades, and Zocdoc. Pay attention to comments about post-surgery care, claim efficiency, and staff professionalism.
✔ Warning Signs to Avoid
- Consistent complaints about surprise billing or denied insurance claims.
- Lack of transparent communication regarding treatment stages.
- Outdated technology or incomplete documentation practices.
Choosing a provider with a strong reputation ensures peace of mind and optimal application of your MetLife implant coverage.
7. Evaluate Post-Operative Support
Aftercare is critical for implant longevity. Confirm that your dentist provides regular follow-up appointments, professional cleanings, and guidance on maintaining oral hygiene. Some clinics include post-treatment maintenance within their implant package, while others bill separately.
Ask whether post-operative visits are covered under your plan’s preventive or major service categories. Many MetLife policies include partial reimbursement for implant maintenance, such as crown repairs or abutment adjustments, if filed under the correct CDT code.
8. International Treatment Considerations
If you’re exploring dental tourism for cost savings, verify that your international provider issues itemized invoices in English and uses CDT-equivalent coding. MetLife reimburses overseas treatments based on U.S. fee schedules, so accurate documentation is vital. Clinics like Redent Klinik Contact Page specialize in assisting patients with documentation and claim submission for international procedures 🌍.
9. Red Flags When Choosing a Dentist
While cost is a factor, don’t let low prices override quality and safety. Be cautious of dentists who:
- Do not provide detailed written treatment plans.
- Refuse to share X-rays or clinical photos.
- Claim implants can be completed in one day without proper evaluation.
- Are unwilling to assist with insurance documentation.
Such practices often lead to denied claims and poor outcomes. A qualified, transparent professional ensures your MetLife implant coverage is fully utilized while maintaining top-tier clinical standards.
10. Final Thoughts: Your Path to an Ideal Implant Experience
Choosing the right dentist is about aligning skill, technology, and insurance compatibility. A well-qualified provider who understands both surgical precision and insurance navigation ensures the best value for your investment. Before committing, request a pre-treatment estimate, review your annual maximums, and confirm your provider’s MetLife credentials.
By following these steps, you’ll ensure that your MetLife implant coverage works to your full advantage, giving you both confidence in your dental health and financial peace of mind. For professional guidance on implant standards and dentist qualifications, consult the American Dental Association — the authority on dental excellence in the U.S. 🏥.
With preparation, clear communication, and careful provider selection, you can enjoy a seamless implant experience — one that restores your smile beautifully while maximizing every benefit MetLife has to offer 😁.