
Top arch dental implants are one of the most effective and permanent solutions for patients who want to restore the full upper jaw with natural-looking, durable, and highly functional teeth. Whether you are dealing with missing teeth, severe decay, or long-term denture problems, a full upper arch implant system can dramatically improve your smile aesthetics, chewing comfort, and oral health. In this comprehensive guide, you will learn every step of the treatment process—from the initial consultation to final restoration—so you know exactly what to expect. 😊
Before diving into the details, it’s important to understand why top arch dental implants have become one of the most preferred treatments in modern implant dentistry. Thanks to advanced surgical planning, digital scanning, titanium implant materials, and high-success-rate techniques, patients can now enjoy fast healing and long-lasting results. The procedure is designed not only to replace missing teeth, but also to preserve bone structure, enhance facial symmetry, and support long-term oral health stability.
The treatment begins with a personalized examination where your dentist evaluates jawbone density, gum health, and overall suitability for top arch dental implants. A combination of 3D imaging, panoramic X-rays, and digital impressions is used to create a precise treatment plan tailored to your anatomy. This ensures that every implant is positioned at the ideal angle to support the final prosthesis securely and comfortably. You may have the opportunity to review different implant-supported options, such as fixed bridges or hybrid prostheses, depending on your needs.
During surgery, titanium implants are placed into the jawbone at strategic points to maximize stability. In many cases, patients may be candidates for immediate temporary teeth—allowing them to leave the clinic with a functional and aesthetic smile on the same day. If bone quality is insufficient, bone grafting or sinus lift procedures may be recommended prior to placement. While this may extend the overall treatment duration, it significantly improves implant success and long-term function.
After placement, the healing period—also known as osseointegration—begins. This natural biological process allows the implants to fuse with the jawbone, creating the strong foundation necessary for long-term stability. Proper healing typically requires 8–16 weeks, during which you will follow specific oral care instructions, dietary guidelines, and hygiene recommendations to ensure the success of your top arch dental implants. Regular follow-up appointments help the clinic monitor bone integration and overall progress.
Once healing is complete, the final stage involves attaching the permanent prosthesis. This custom-made restoration is crafted to match the color, shape, and alignment of your natural teeth, ensuring a harmonious and realistic smile. The prosthesis is secured with high-strength components that offer durability, stability, and exceptional comfort. Patients often report a dramatic improvement in self-confidence, speech clarity, and chewing performance after completing their top arch dental implants treatment.
An important part of your long-term success is proper maintenance. Although implants cannot decay, surrounding gum tissues require ongoing care. Daily brushing, flossing (or water flossing), and routine professional cleanings are essential to ensure the health of the supporting structures. Most dentists recommend visiting every 6 months for maintenance checks. With proper care, top arch dental implants can last decades—often a lifetime.
If you would like to speak with a specialist or schedule a consultation, you can easily reach the clinic through the
Redent Klinik Contact Page.
For professional implant-related guidelines and educational resources, you may also visit the
American Dental Association.
Finally, remember that top arch dental implants are not only a cosmetic enhancement—they provide functional stability, prevent bone loss, and improve overall oral well-being. Whether you are switching from dentures or looking for a complete upper arch reconstruction, this transformative treatment delivers long-term comfort, aesthetic excellence, and a renewed sense of confidence. 🌟
Diş Teli Tedavisine Hazırlık: İlk Muayene ve Planlama
Ortodontik Muayenenin Amacı ve Sürecin İlk Adımı
“Adım adım diş teli” tedavisinin en kritik aşamalarından biri, doğru şekilde yapılan bir ilk muayenedir. Bu muayene, tedavinin ne kadar süreceğini, hangi yöntemlerin uygulanacağını ve ağız yapınızın hangi ortodontik tekniklere uygun olduğunu belirlemek için zorunludur. Ortodontist, dişlerin hizalanmasını, çene yapısını, kapanışı ve genel ağız sağlığını değerlendirir. Bu değerlendirme sırasında geçmiş tedavileriniz, varsa çene eklemi problemleriniz, çürük veya diş eti sorunlarınız ayrıntılı şekilde incelenir. 😊
Bu aşama, tedavi sürecinin temelini oluşturduğu için son derece önemlidir.
Fotoğraflama, Model ve Dijital Kayıtların Alınması
Tedavinin “adım adım diş teli” mantığıyla ilerlemesi için detaylı kayıtların tutulması gerekir. Ortodontist, yüz ve ağız içi fotoğraflarınızı çeker, dişlerin 3 boyutlu modellemesini oluşturur ve dijital taramalar alır. Bu veriler, tedavi planının kişiye özel şekilde hazırlanmasını sağlar.
Bazı klinikler artık tamamen dijital tarama sistemleri kullanarak ölçü işlemini daha konforlu hâle getirir. Dijital modeller, hem daha hassas sonuç verir hem de tedavi süresince ilerlemenizin takip edilmesinde büyük avantaj sağlar.
Radyografik İnceleme: Panoramik ve Sefalometrik Filmler
Ortodontik tedavide radyografi vazgeçilmezdir. Radyolojik inceleme, dişlerin kök yapısı, çene kemiği durumu, gömülü dişler, çene ilişkisi ve ortodontik hareketi etkileyen tüm anatomik unsurlar hakkında net bilgi verir.
Panoramik film genel ağız sağlığınızı gösterirken, sefalometrik film çene ilişkilerini değerlendirmek için kullanılır. Bu filmler olmadan ortodontik tedavi planı eksik kalır.
Muayene sırasında elde edilen tüm görüntüler birleştirilir ve detaylı analiz yapılır. Bu analiz, “adım adım diş teli” sürecinin bilimsel temelini oluşturur.
Tedavi Planının Oluşturulması
Ortodontistiniz tüm kayıtları inceledikten sonra, kişiye özel tedavi planınızı hazırlamaya başlar. Bu plan; braket türünden tedavi süresine, ayda kaç kontrol yapılacağından hangi ek apareylerin kullanılacağına kadar tüm detayları içerir.
Bu aşamada şu sorulara cevap verilir:
- Hangi diş teli türü size daha uygundur? (Metal, seramik, self-ligating, lingual vb.)
- Kapanış problemleriniz nasıl düzeltilecektir?
- Ağız içi genişletme veya çekim gerekecek mi?
- Tahmini tedavi süresi ne kadardır?
- İlk haftalarda nasıl bir süreç sizi bekliyor?
Tedavi planı tamamen kişiye özel oluşturulur ve süreç boyunca gerektiğinde revize edilebilir. Bunun nedeni, dişlerin hareket hızının kişiden kişiye değişmesidir.
Ağız Hijyeni ve Tedavi Öncesi Hazırlık
Diş teli tedavisinin sağlıklı ilerleyebilmesi için tedavi öncesinde ağız hijyeninin mükemmel olması gerekir. Çürük, diş eti hastalıkları veya taş oluşumu varsa önce bunlar tedavi edilir.
Ortodontik tedaviye başlamadan önce şu hazırlıkların yapılması önerilir:
- Profesyonel diş taşı temizliği
- Gerekirse çürük tedavileri
- Diş eti iltihabının giderilmesi
- Ağız bakım rutininin düzenlenmesi
Bu hazırlıklar, “adım adım diş teli” sürecinin sorunsuz ilerlemesi için olmazsa olmaz aşamalardır.
Tedavi Sürecinin Netleştirilmesi ve Sık Sorulan Sorular
Muayene sonunda ortodontistiniz size tedavinin adımlarını açık ve anlaşılır biçimde aktarır. Her hastanın aklında şu sorular bulunur:
- Diş teli acıtır mı?
- Süreç ne kadar sürer?
- Yemek alışkanlıklarım nasıl değişecek?
- Aylık kontroller nasıl yapılacak?
Ortodontistiniz tüm bu soruları ayrıntılı olarak açıklar. Böylece tedaviye başlamadan önce tüm aşamaları bilerek psikolojik olarak da hazır olursunuz.
İç Bağlantı (Internal Link)
Randevu almak veya süreci daha detaylı öğrenmek isterseniz
Redent Klinik İletişim Sayfası üzerinden kliniğe ulaşabilirsiniz.
Dış Bağlantı (External Link)
Resmî ortodontik prosedürler ve Türkiye’deki düzenlemeler hakkında bilgi almak isterseniz
Türk Diş Hekimleri Birliği sayfasını inceleyebilirsiniz.
Bu aşamalar tamamlandığında artık tedavinin bir sonraki bölümüne, yani braket yerleştirme adımına geçmeye hazırsınız. “Adım adım diş teli” süreci tam olarak bu noktada ana tedavi aşamalarına doğru ilerlemeye başlar. Her adım bilimsel temellere dayanır ve profesyonel ortodontik kontrol altında titizlikle uygulanır. Böylece hem estetik hem fonksiyon açısından mükemmel bir sonuç elde etmek mümkündür. 😄
Initial Evaluation for Top Arch Dental Implants: Examination and Planning
Comprehensive Oral Assessment Before Implant Placement
The success of top arch dental implants begins long before the surgical procedure itself. A detailed clinical evaluation is the foundation of a predictable, long-lasting, and functional treatment. During the first appointment, your implant specialist conducts a full oral assessment to determine whether your upper jawbone, gum tissues, and bite relationship are healthy enough to support a complete upper arch restoration.
This step is crucial because top arch restorations require strategic implant placement, optimal bone structure, and stable soft tissues to ensure long-term success. The dentist examines signs of gum inflammation, periodontal pockets, early bone loss, tooth mobility, oral lesions, and any structural abnormalities that might influence implant outcomes.
In many cases, patients seeking top arch dental implants previously struggled with removable dentures, chronic discomfort, or multiple missing teeth. This evaluation helps identify the exact causes and develop a tailored approach that restores both aesthetics and function. 😊
Digital Imaging, 3D Scanning, and Radiographic Diagnostics
Modern implant dentistry relies heavily on advanced diagnostic technology. High-resolution 3D imaging (CBCT), panoramic X-rays, and digital impressions allow the dentist to analyze jawbone volume, nerve pathways, sinus cavities, and bone density with extraordinary accuracy.
These detailed scans reveal vital information about your upper arch, including:
- Thickness and height of the maxillary bone
- Sinus proximity and sinus membrane condition
- Existing tooth roots, remnants, or impacted teeth
- Bone density required to support top arch dental implants
- Potential need for bone grafting or sinus lift procedures
This precise imaging ensures that each implant is placed in the safest, strongest, and most anatomically appropriate position. By doing so, clinicians dramatically increase the success rate of top arch dental implants and help prevent future complications.
Systemic Health Review and Medical History
Aside from oral conditions, your overall medical health plays a major role in determining candidacy for full arch implants. Your dentist reviews factors such as:
- Diabetes control levels (HbA1c)
- Autoimmune disorders
- Smoking habits
- Medications affecting bone healing
- History of osteoporosis or bisphosphonate therapy
A stable medical profile increases the success rate of top arch dental implants because systemic health affects bone healing, tissue regeneration, and osseointegration. If underlying conditions require management, your dentist may collaborate with your physician before moving forward.
Determining the Right Implant Approach
The evaluation appointment also helps the specialist decide which full-arch implant approach is most suitable for your case. Modern dentistry offers several techniques, each tailored to different anatomical and cosmetic needs:
- All-on-4 for patients with moderate bone density
- All-on-6 for increased stability and load distribution
- Hybrid fixed prosthesis (implant-supported bridge)
- Zygomatic implants for severe maxillary bone loss
The size, angle, and position of each implant are planned digitally to create a strong foundation for the final prosthesis. This personalized approach ensures that your top arch dental implants will offer maximum comfort, durability, and natural aesthetics.
Smile Design and Aesthetic Planning
Aesthetic evaluation is equally important. Before the surgical phase, your dentist analyzes facial proportions, lip dynamics, smile line, and jaw movement to design the most natural-looking upper arch possible.
Factors considered include:
- Tooth length and width
- Shade and translucency
- Gum symmetry
- Bite alignment
This ensures that the final result not only functions well but also looks harmonious with your facial structure. The goal is to create a smile that feels uniquely yours.
Internal and External Resources
To schedule a consultation or request additional information, you can visit the
Redent Klinik Contact Page.
For scientifically backed guidelines on implant dentistry, the
American Dental Association
provides valuable clinical resources.
A thorough evaluation is essential because it sets the foundation for every step that follows. When done correctly, it ensures that your top arch dental implants are placed with absolute precision, resulting in long-term stability, aesthetic excellence, and renewed confidence. 🌟
How Top Arch Dental Implants Are Placed: Step-by-Step Surgical Procedure
Understanding the Surgical Foundation of Full Upper Arch Restoration
The placement of top arch dental implants is a sophisticated, highly coordinated surgical procedure designed to restore the complete upper jaw with maximum stability, aesthetics, and long-term function. Because the entire upper arch is supported by a set number of implants—usually four, six, or more—the surgical sequence must be executed with extreme precision.
This section provides a detailed, clinically accurate walkthrough of each phase of the implant placement process, allowing patients to understand exactly how their new smile is created. By learning what happens during surgery, you can approach treatment with confidence, realistic expectations, and peace of mind. 😊
Throughout the surgery, digital guides, anatomical mapping, and advanced implant protocols ensure that each implant integrates perfectly with the bone, setting the foundation for long-lasting results.
Step 1: Pre-Surgical Preparation and Anesthesia
Before the placement begins, your implant team reviews your digital plan to validate implant angles, bone density, and prosthetic positioning.
On the day of the procedure, you will receive one of the following:
- Local anesthesia (numbs the upper jaw)
- Conscious sedation (reduces anxiety and awareness)
- General anesthesia (complete sleep, for complex cases)
The choice depends on your comfort level, medical history, and the complexity of your top arch dental implants case. Most patients describe the experience as surprisingly comfortable, thanks to modern anesthesia and minimally invasive techniques.
Step 2: Removal of Failing Teeth (If Necessary)
If any remaining upper teeth are decayed, broken, or structurally compromised, they are gently extracted during the same appointment.
To preserve bone integrity, the surgeon uses atraumatic extraction techniques. This immediate extraction approach allows the placement of top arch dental implants in the same session, if the bone structure permits.
Removing compromised teeth prevents infection and prepares the upper arch for a stable implant foundation.
Step 3: Precise Implant Site Preparation
Once the extraction sites and gum tissues are cleared, the bone preparation begins. Using digital surgical guides or navigation systems, the surgeon marks the exact positions where implants will be placed.
This alignment ensures:
- Maximum stability and long-term durability
- Accurate load distribution across the top arch
- Optimal alignment with the planned prosthetic teeth
- Reduced surgical trauma and faster healing
Using special implant burs, small channels are created in the bone to house the implants securely. These channels are formed with controlled speed and pressure to protect the surrounding tissues and maintain bone quality.
Step 4: Insertions of the Implants Into the Jawbone
This is the heart of the surgical process. Titanium implants—biocompatible structures that act as artificial tooth roots—are placed into the prepared channels.
Depending on your needs, your surgeon may place:
- 4 implants (All-on-4 technique)
- 6 implants (All-on-6 approach)
- More implants for additional stability, especially if bone volume allows
Each implant is inserted at a specific angle designed to increase contact with available bone and provide maximum anchorage. Angled posterior implants often bypass the sinus, eliminating the need for sinus lift surgery in many cases.
Once placed, the implants become the foundation for your final top arch prosthesis.
This stage is critical because the long-term success of top arch dental implants relies on proper angulation, depth, and primary stability.
Step 5: Immediate Temporary Prosthesis (Same-Day Smile)
One major advantage of modern implant systems is the ability to provide immediate temporary teeth. After verifying the stability of the implants, your dentist attaches a custom temporary bridge that allows you to:
- Leave the clinic with a complete upper smile
- Eat soft foods comfortably
- Speak with more clarity
- Maintain natural facial contours
This temporary prosthesis is aesthetic and functional, but not intended for heavy chewing. It protects your implants during the osseointegration phase while ensuring you never go without teeth.
Step 6: Post-Surgical Instructions and Recovery
Following the surgical placement of top arch dental implants, your dentist provides detailed aftercare instructions. These include:
- Cold compress application to reduce swelling
- Prescribed medications to support healing
- Soft-food diet for the first 1–2 weeks
- Instruction on how to clean around the temporary prosthesis
Proper compliance during this period ensures that your implants integrate with the bone smoothly and securely.
Helpful Resources
To book a consultation or ask questions regarding the procedure, visit the
Redent Klinik Contact Page.
For additional clinical standards and implant dentistry recommendations, refer to the
American Dental Association.
The surgical phase is a life-changing moment for many patients. By placing durable, high-strength titanium roots into the jawbone, top arch dental implants create the foundation for a future of confident smiling, stable chewing, and long-term oral health. 🌟
This step sets the stage for the healing process and, eventually, your permanent custom-designed prosthesis.
The First Week After Top Arch Dental Implants: Healing, Adaptation, and Patient Guidance
Understanding the Critical First Week of Healing
The first week following the placement of top arch dental implants is one of the most sensitive and important healing periods in the entire treatment journey. During this phase, your implants begin the early stages of integration with the upper jawbone while your gum tissues start recovering from the surgical procedure.
Patients often experience a combination of mild swelling, sensitivity, and adjustments to their new temporary prosthesis. These reactions are completely normal and are part of the body’s natural healing response. What matters most is managing this period with proper care, adherence to instructions, and awareness of what to expect at every step.
This comprehensive guide provides you with the most accurate, clinically grounded insights into how the first week unfolds and how to ensure a stable, healthy recovery.
Day-by-Day Recovery Expectations
Although each patient’s healing experience is unique, there are common patterns observed in the first seven days after top arch dental implants surgery. Understanding them will help you stay calm, informed, and confident:
- Day 1–2: Swelling and slight bleeding are normal. Follow cold compress instructions to reduce inflammation.
- Day 3–4: Swelling begins to peak, but pain typically lessens. You may start adapting to your temporary prosthesis.
- Day 5–7: Gum tissues start stabilizing. Bruising may fade. Chewing and speaking improve noticeably.
During this period, your dentist may check in with you through a follow-up appointment or phone call to ensure that your top arch dental implants are healing as expected.
Managing Swelling, Bruising, and Mild Discomfort
Post-operative swelling is a natural response to implant surgery. In most cases, swelling peaks around 48 hours after the procedure and gradually reduces throughout the week. The following strategies help manage this phase effectively:
- Apply cold compresses to the cheeks for 20 minutes on, 20 minutes off.
- Keep your head elevated during sleep to improve fluid drainage.
- Use anti-inflammatory medications prescribed by your dentist.
- Avoid hot drinks and strenuous activity during the first 48 hours.
These steps contribute to stabilizing the healing environment around your top arch dental implants, allowing osseointegration to begin smoothly.
Adapting to the Temporary Upper Arch Prosthesis
One of the unique aspects of full arch implant dentistry is immediate functional restoration. Most patients walk out of surgery with a fully attached temporary upper arch prosthesis. While this is a major advantage, it also means the first week requires a period of adaptation.
Common adaptation experiences include:
- A fuller feeling in the upper jaw
- Slight pressure when biting down
- Changes in speech patterns
- Increased saliva flow during the first few days
Do not worry—these sensations typically fade as your mouth adjusts. By the end of the first week, most patients feel significantly more comfortable speaking, smiling, and chewing softer foods with their temporary prosthesis.
Essential Nutrition and Soft-Food Diet Recommendations
A soft-food diet is strongly recommended during the first week to protect your new top arch dental implants. Although your temporary teeth are stable, they are not meant for heavy chewing or pressure.
Ideal foods include:
- Mashed potatoes
- Scrambled eggs
- Smoothies and protein shakes
- Yogurt, pudding, soups
- Soft, steamed vegetables
Avoid hard, crunchy, sticky, or chewy foods. This prevents implant micro-movement, which is essential for proper bone integration. Hydration is equally important—drink plenty of water, but avoid straws during the first 72 hours to prevent unnecessary suction near the surgical sites.
Oral Hygiene in the First Week: A Delicate Balancing Act
Keeping the mouth clean without disturbing the implant sites is one of the most crucial tasks during the first week. Here are the clinically recommended guidelines:
- Do not brush the surgical areas for 48 hours.
- Rinse gently with warm saltwater 2–3 times a day starting on day 2.
- Use any prescribed antimicrobial mouthwash as directed.
- Brush and clean the prosthesis carefully without applying pressure near the implant posts.
Maintaining hygiene around your top arch dental implants lowers the risk of infection and supports faster tissue healing.
Speech Adjustments: What to Expect
It is very common to experience temporary changes in speech, especially with sounds that require tongue-to-palate contact. Because the upper arch prosthesis changes the internal geometry of the mouth, it takes a few days for the tongue to adapt.
Most patients regain natural speech patterns by the end of the first week. Practicing reading aloud can accelerate adaptation and improve confidence.
When to Contact the Clinic
While most symptoms are normal, contact your clinic if you experience:
- Unusual swelling that worsens after day 4
- Sharp or increasing pain
- Signs of infection (fever, persistent bad taste)
- Movement or looseness in the temporary prosthesis
You can always reach your care team through the
Redent Klinik Contact Page.
For additional clinical guidelines, the
American Dental Association
offers valuable, evidence-based recommendations.
The first week after receiving top arch dental implants sets the foundation for long-term stability and success. By following instructions closely and understanding each stage of healing, you ensure that your implants integrate smoothly, your comfort improves daily, and your path to a permanent, beautiful smile moves forward with confidence. 🌟
Monthly Follow-Ups for Top Arch Dental Implants: Adjustments, Monitoring, and Long-Term Stability
Why Monthly Follow-Ups Matter for Implant Success
After the surgical placement of top arch dental implants, regular follow-up appointments become a vital part of ensuring long-term success, stability, and patient comfort. These visits are not simply “check-ups”—they are essential clinical steps where your implant specialist evaluates bone integration, gum health, prosthesis comfort, and overall healing progress.
Because full upper arch restorations involve multiple implants supporting an entire prosthetic structure, each monthly visit helps detect early signs of potential complications, ensuring that the treatment remains on track.
Patients often underestimate this phase, but implant dentistry research shows that structured follow-ups dramatically increase long-term survival rates. 🌟
What Happens During a Typical Monthly Appointment?
Each follow-up is designed to evaluate the healing of your top arch dental implants and make necessary adjustments. A standard monthly session includes:
- Clinical examination of gum tissue, implant sites, and prosthesis fit
- Assessment of osseointegration—the stability of implants within the bone
- Checking bite alignment to avoid pressure imbalances
- Adjusting the temporary prosthesis for comfort and proper function
- Evaluating oral hygiene and plaque control around the implants
- Reviewing patient comfort and addressing concerns
These steps help ensure that each implant continues to integrate correctly and that no part of the temporary prosthesis interferes with healing. Monthly visits also provide an opportunity to update your dentist on your eating habits, speech changes, or any discomfort.
Monitoring Osseointegration: The Key Biological Process
Osseointegration is the scientific term for the biological process that allows top arch dental implants to fuse with the jawbone. This process typically takes 8–16 weeks and may vary depending on bone density, overall health, and implant design.
During follow-ups, your dentist assesses osseointegration using:
- Periotest measurements to evaluate implant stability
- Digital X-rays to monitor bone density around the implants
- Manual stability testing for micro-movement detection
Any signs of delayed integration or bone resorption are addressed early—preventing long-term issues and ensuring that your implants remain strong enough to support the final prosthesis.
Adjustments to the Temporary Dental Prosthesis
Your temporary upper arch prosthesis is designed to protect the implants while providing normal function. However, it is normal for minor adjustments to be needed during the first 2–3 months.
Your dentist may:
- Reduce pressure points
- Adjust bite alignment
- Smooth acrylic surfaces causing irritation
- Refine the fit around healing gums
These adjustments ensure comfort and prevent excessive force on the healing top arch dental implants. A well-adjusted prosthesis also improves speech clarity, chewing efficiency, and day-to-day confidence while waiting for your final restoration.
Managing Gum Health Throughout the Healing Process
Healthy gums are essential for the long-term stability of your implants. During each visit, your dentist checks for:
- Inflammation or redness
- Signs of peri-implant mucositis
- Plaque accumulation around prosthesis edges
- Tissue healing progress
If needed, a gentle professional cleaning is performed to protect the tissues surrounding your top arch dental implants. Maintaining gum health dramatically increases the lifespan of your implants and prevents complications.
Evaluating Oral Hygiene Practices
Your dentist also reviews your home-care routine, ensuring that you are cleaning around implants effectively without disturbing healing tissues. Many patients benefit from:
- Water flossers
- Interdental brushes
- Antimicrobial mouth rinses
- Soft-bristle toothbrushes
Proper hygiene is crucial, especially during the early months when tissues are more sensitive.
Determining When You’re Ready for the Final Prosthesis
One of the most important questions patients ask is:
“When will I get my final teeth?”
Your ability to transition from a temporary prosthesis to the final custom-made restoration depends on clinical markers observed during monthly follow-ups:
- Strong osseointegration
- Stable bite alignment
- Healthy, fully healed gum tissue
- No signs of inflammation or bone loss
When all implants demonstrate sufficient stability, your dentist takes detailed impressions or digital scans to begin designing your final upper arch prosthesis.
Internal and External References
For questions or scheduling follow-up care, you can reach the clinic via the
Redent Klinik Contact Page.
For professional implant-related guidelines, refer to the
American Dental Association.
Monthly follow-ups are far more than routine visits—they are the backbone of successful healing for top arch dental implants. By attending each appointment, you protect your investment, ensure a stable recovery, and pave the way for a beautifully crafted, long-lasting upper arch restoration. 🌟
Living With Top Arch Dental Implants: Daily Care, Maintenance, and Lifestyle Considerations
Understanding Daily Life After a Full Upper Arch Restoration
Adjusting to top arch dental implants is a rewarding experience that allows patients to regain full chewing function, natural aesthetics, and long-term comfort. However, living with a full upper arch implant system also requires consistent maintenance, attentive care, and awareness of certain lifestyle habits that can influence the longevity of your implants.
Unlike removable dentures, which require adhesives and can shift during eating or speaking, top arch dental implants provide a stable foundation securely anchored into the jawbone. This stability allows you to enjoy a more natural-feeling daily routine—speaking confidently, smiling freely, and chewing a wider variety of foods.
This guide explains everything you need to know about living with your implants on a day-to-day basis and maintaining them for life.
Daily Oral Hygiene Routine for Implant Longevity
A strong oral hygiene routine is essential to preserve the health of your implants, gum tissues, and final prosthesis. While implants cannot decay like natural teeth, they can still develop complications if plaque accumulates along the gumline. Following a precise daily routine ensures that top arch dental implants remain strong, stable, and free from infections.
- Brushing: Use a soft-bristle toothbrush to clean around the gumline at least twice daily.
- Flossing: Use water flossers or implant-safe interdental brushes to reach areas beneath the prosthesis.
- Mouth Rinse: Use an alcohol-free antimicrobial rinse if recommended.
- Prosthesis Cleaning: Clean around the attachment points and any exposed implant surfaces.
Consistency is the key. Patients who maintain strong hygiene routines almost always enjoy significantly longer-lasting top arch dental implants with fewer complications.
Eating and Chewing: What Changes to Expect
After the healing phase is complete and the final prosthesis is in place, eating becomes significantly easier and more enjoyable. Full upper arch implants distribute pressure evenly across the jaw, allowing you to chew with confidence and comfort.
However, even the most durable implant-supported prosthesis requires certain precautions to maximize longevity. Recommended eating habits include:
- Avoid biting extremely hard foods directly with the front teeth.
- Cut tougher foods into smaller pieces.
- Limit frequent consumption of sticky candies.
- Chew slower during the first few weeks of adaptation.
In most cases, patients report that eating with top arch dental implants feels as close to natural teeth as they have experienced since youth. The stability, balance, and strength of the implants make daily meals far more comfortable than dentures or compromised natural teeth ever could.
Speech and Communication With Your New Smile
Because the implant-supported prosthesis adds support to lip and cheek structures, many patients notice an improvement in speech clarity. However, very minor speech adjustments may occur in the early days of wearing the final prosthesis.
Practicing reading aloud, repeating tongue-tip sounds (such as “t,” “d,” “s”), and speaking slowly at first accelerate adaptation. Most patients regain smooth and natural articulation within a few days.
Protecting Your Implants During Sleep and Physical Activity
To maintain your top arch dental implants for decades, it’s important to protect them from excessive force, grinding, or trauma. Two critical guidelines include:
- Night Guards: Patients with bruxism (teeth grinding) should wear a custom night guard.
- Sports Guards: Anyone participating in contact sports must wear a protective mouthguard.
These protective devices shield the implants and prosthesis from excessive bite pressure and accidental impact—greatly extending their lifespan.
Avoiding Habits That Can Damage Your Implants
Lifestyle habits significantly influence the durability of top arch dental implants. Certain behaviors should be avoided entirely, including:
- Using teeth to open packaging or bottles
- Chewing on ice, pens, or fingernails
- Smoking, which slows healing and increases implant failure risks
- Frequent grinding without wearing a night guard
Smoking is particularly harmful because it reduces oxygen flow to the gums, delays healing, and increases the likelihood of peri-implant infections. Reducing or eliminating harmful habits is essential for long-term success.
Maintaining Gum Health Around the Final Prosthesis
Healthy gums are the foundation of stable implants. Even though the prosthetic teeth are artificial, the surrounding tissues are living structures that require ongoing care. During daily cleaning, gently massage the gumline to stimulate circulation and keep tissues firm.
Patients who maintain strong gum health experience higher long-term success rates with top arch dental implants.
Scheduling Routine Professional Maintenance
In addition to at-home care, professional cleanings every 4–6 months are essential. Implant-specific cleaning instruments are used to remove plaque and tartar around the prosthesis without damaging the implant surfaces. These routine check-ups help detect any early signs of inflammation or wear on the prosthesis.
During these visits, the dentist evaluates the health of your tissues, the stability of your implants, and the fit of your prosthesis.
Important Resources and Support
For appointments, adjustments, or follow-ups, you can contact the team through the
Redent Klinik Contact Page.
To learn more about implant care standards, visit the
American Dental Association.
Living with top arch dental implants is a transformative experience that restores functionality, aesthetics, and confidence. With proper care, attention to hygiene, and healthy habits, your implants can last for decades—often a lifetime. This stage of the journey represents not only a functional improvement but a renewed way of living with comfort and pride. 🌟
Common Problems During Top Arch Dental Implants Treatment and How to Resolve Them
Understanding Potential Challenges in a Full Upper Arch Implant Journey
Although top arch dental implants are known for their reliability, high success rates, and long-term durability, the treatment process can sometimes include common challenges that require careful attention. These issues are not typically dangerous, but early recognition and proper management ensure that the implants continue to heal correctly and function as intended.
Patients undergoing a full upper arch restoration may experience temporary discomforts, gum sensitivity, prosthesis pressure points, speech changes, or minor healing complications. By learning what to expect and how to respond, you can confidently navigate the process and support optimum healing.
In this section, we address the most frequent problems observed throughout treatment and provide clinically accurate solutions to help you achieve the best results possible.
1. Temporary Gum Swelling and Inflammation
Mild gum swelling is one of the most common postoperative conditions after the placement of top arch dental implants. This typically occurs during the first week as tissues adapt to surgical manipulation. Inflammation is the body’s natural healing response and often resolves quickly with proper care.
To manage swelling effectively, patients should:
- Apply cold compresses during the first 48 hours.
- Use prescribed anti-inflammatory medications.
- Rinse gently with warm saltwater after the first 24 hours.
- Sleep with the head elevated to reduce fluid buildup.
If swelling persists longer than expected, a follow-up visit is recommended to ensure there are no signs of infection or prosthesis irritation.
2. Soreness or Discomfort Under the Temporary Prosthesis
The temporary prosthesis attached after surgery is designed to protect your healing implants, but in some cases, pressure points can develop. These are areas where the acrylic gently rubs against healing tissues, causing tenderness.
This issue is common during the early stages of top arch dental implants healing, and your dentist can easily correct it with a minor adjustment. Patients should avoid attempting to modify or file the prosthesis themselves.
3. Difficulty Chewing or Biting During the Adjustment Phase
As your jaw and muscles adapt to the new structure, chewing patterns may feel unfamiliar. This is especially normal during the first few weeks, and most patients regain comfortable chewing habits after healing progresses.
To minimize challenges:
- Stick to soft foods during the initial healing period.
- Cut tougher foods into smaller pieces.
- Chew slowly and evenly.
These habits prevent unnecessary pressure on the healing top arch dental implants and support smooth adaptation.
4. Speech Changes and Adaptation Difficulties
The temporary upper arch prosthesis may affect tongue movement or air flow during speech, leading to mild temporary lisping. Patients often describe this phase as an adjustment rather than a major challenge.
To accelerate adaptation:
- Practice reading aloud for a few minutes daily.
- Repeat “s,” “t,” and “d” sounds slowly and clearly.
- Give your tongue time to learn the new contours of the prosthesis.
Most patients regain natural speech within days or weeks, depending on the complexity of their case.
5. Food Getting Trapped Around the Prosthesis
It is normal for food particles to collect around the edges of the temporary prosthesis, especially while healing is ongoing. This is particularly common with full upper arch designs and not a sign of implant failure. Proper hygiene prevents irritation or infection.
Recommended cleaning tools include:
- Water flossers
- Interdental brushes
- Low-pressure oral irrigators
Keeping these areas clean helps protect the soft tissues surrounding your top arch dental implants during the healing process.
6. Minor Bleeding During Cleaning
Slight bleeding while brushing or rinsing can occur for several days after surgery. This is usually due to sensitive gum tissues and improves naturally. Patients should continue brushing gently and avoid contacting the surgical sites directly for the first 48 hours.
7. Occlusion (Bite) Issues and Prosthetic Pressure
When the bite does not align perfectly, you may feel uneven pressure on one side of the prosthesis. This is one of the most common issues during the adaptation stage and is typically resolved with a quick adjustment during a follow-up visit.
Proper bite alignment is essential for preventing overloading on any implant.
With timely adjustments, top arch dental implants maintain stability and minimize wear on the prosthesis.
8. Sinus Pressure or Mild Congestion
Because the upper jaw is close to the sinus cavity, some patients may experience temporary sinus pressure or mild congestion. This is not dangerous and usually subsides as tissues heal.
If symptoms persist or worsen, your dentist may recommend a sinus evaluation.
When Problems Require Immediate Attention
Although most issues are minor, certain symptoms may indicate complications that require urgent care:
- Sharp or increasing pain
- Pus or discharge around implant sites
- Implant mobility
- Persistent fever
These symptoms may point to infection or implant instability and must be addressed promptly to protect the top arch dental implants.
Helpful Resources and Professional Support
For timely assistance or to schedule a follow-up, visit the
Redent Klinik Contact Page.
Evidence-based implant care guidelines are also available at the
American Dental Association.
Although challenges may arise throughout the healing journey, the majority are predictable, temporary, and easily managed with professional care. When addressed promptly, these issues do not affect the long-term success of top arch dental implants. With patience, proper hygiene, and regular communication with your dental team, you can confidently progress toward a healthy, beautiful upper arch restoration. 🌟
Removal of Temporary Prosthesis, Final Prosthetic Placement, and Long-Term Retention After Top Arch Dental Implants
Understanding the Transition From Temporary to Permanent Restoration
After the successful healing and integration period of top arch dental implants, patients finally reach one of the most anticipated phases of their treatment: the removal of the temporary prosthesis and the placement of the final, custom-designed permanent restoration. This stage marks the completion of the functional and aesthetic transformation that began during surgery.
While the temporary prosthesis plays a vital role in protecting the implants during osseointegration, the permanent prosthesis offers superior strength, stability, aesthetics, and long-term comfort. Understanding how this transition works helps patients appreciate the final results and maintain their implants for life.
Removing the Temporary Upper Arch Prosthesis
The temporary prosthesis is carefully detached once the dentist confirms through clinical examination and radiographic evidence that the implants have fully integrated. This process is painless and performed under standard clinical conditions.
The removal step allows the dentist to:
- Evaluate the condition of each implant
- Inspect the gum tissue and soft-tissue contours
- Measure implant stability values (ISQ readings)
- Check for any inflammation or tissue inconsistencies
If any areas of concern arise, they are addressed before moving to the final stage. The healthy foundation provided by well-integrated top arch dental implants ensures long-term success and durability of the final prosthesis.
Digital Scanning and Impressions for the Final Prosthesis
Once the temporary bridge is removed, the dentist takes highly precise digital impressions or analog molds of the upper jaw.
These scans capture:
- The exact position and angulation of each implant
- Gum contours and tissue levels
- The patient’s bite relationship
- Smile line and lip dynamics
Digital scanning technologies such as intraoral scanners produce extremely accurate models, ensuring that the final prosthesis fits comfortably and harmoniously with the patient’s oral anatomy. These detailed measurements enable the creation of a personalized upper arch that complements facial aesthetics while supporting natural speech and chewing ability.
Crafting the Final Upper Arch Prosthesis
The permanent upper arch can be fabricated from several durable materials, including zirconia, nano-ceramic hybrid composites, or high-strength PMMA. Zirconia, in particular, is highly valued for its resistance to fracture, natural translucency, and long-term strength.
The design process includes:
- Selecting tooth color and shape
- Customizing gum shade for natural aesthetics
- Refining bite alignment
- Ensuring even distribution of chewing forces
Proper fabrication ensures the final restoration will complement all functional and cosmetic aspects of your smile. This is a defining moment in your top arch dental implants journey, as the final prosthesis represents the long-lasting transformation you’ve worked hard to achieve.
Placement and Adjustment of the Final Prosthesis
Once the final arch is ready, the dentist attaches it securely to the implants using precision screws or abutments. Multiple clinical checks are performed, including:
- Testing bite pressure and occlusion
- Ensuring comfort during speaking and swallowing
- Checking for any pressure points on the gums
- Evaluating aesthetics from multiple angles
If adjustments are needed, they are made immediately. The goal is to ensure that the final prosthesis fits perfectly and functions smoothly. Patients often describe this moment as “life-changing,” as they see their final smile for the first time—complete, stable, and beautifully aligned.
Long-Term Retention and Post-Placement Care
The long-term retention phase focuses on maintaining the health, stability, and function of your new smile. Although the prosthesis is durable, routine maintenance is essential.
Key recommendations include:
- Regular brushing and flossing to maintain gum health
- Professional cleanings every 4–6 months
- Wearing a night guard if you grind your teeth
- Avoiding extremely hard foods that could damage the prosthesis
Consistent check-ups ensure that your top arch dental implants remain stable and that the surrounding tissues stay healthy. Proper maintenance can extend the lifespan of the prosthesis for decades.
Recognizing Early Signs of Potential Issues
Even though full arch implants have exceptionally high success rates, minor issues can develop over time. Early detection helps prevent complications. Watch for:
- Unusual pressure or discomfort
- Loosening of the prosthesis
- Changes in bite alignment
- Redness or swelling around the gums
If you notice any of these signs, schedule a follow-up appointment promptly. Timely care preserves the long-term integrity of your implants and prosthesis.
Internal and External References
To schedule adjustments or follow-up evaluations, visit the
Redent Klinik Contact Page.
For additional professional guidance about implants and prosthetics, the
American Dental Association
provides authoritative clinical resources.
Transitioning from a temporary prosthesis to a permanent restoration is the culmination of the entire top arch dental implants process. It represents the moment when function, aesthetics, and comfort come together to form a final smile that can last a lifetime. With proper care, routine monitoring, and a commitment to oral health, patients can enjoy the full benefits of their new upper arch for decades. 🌟
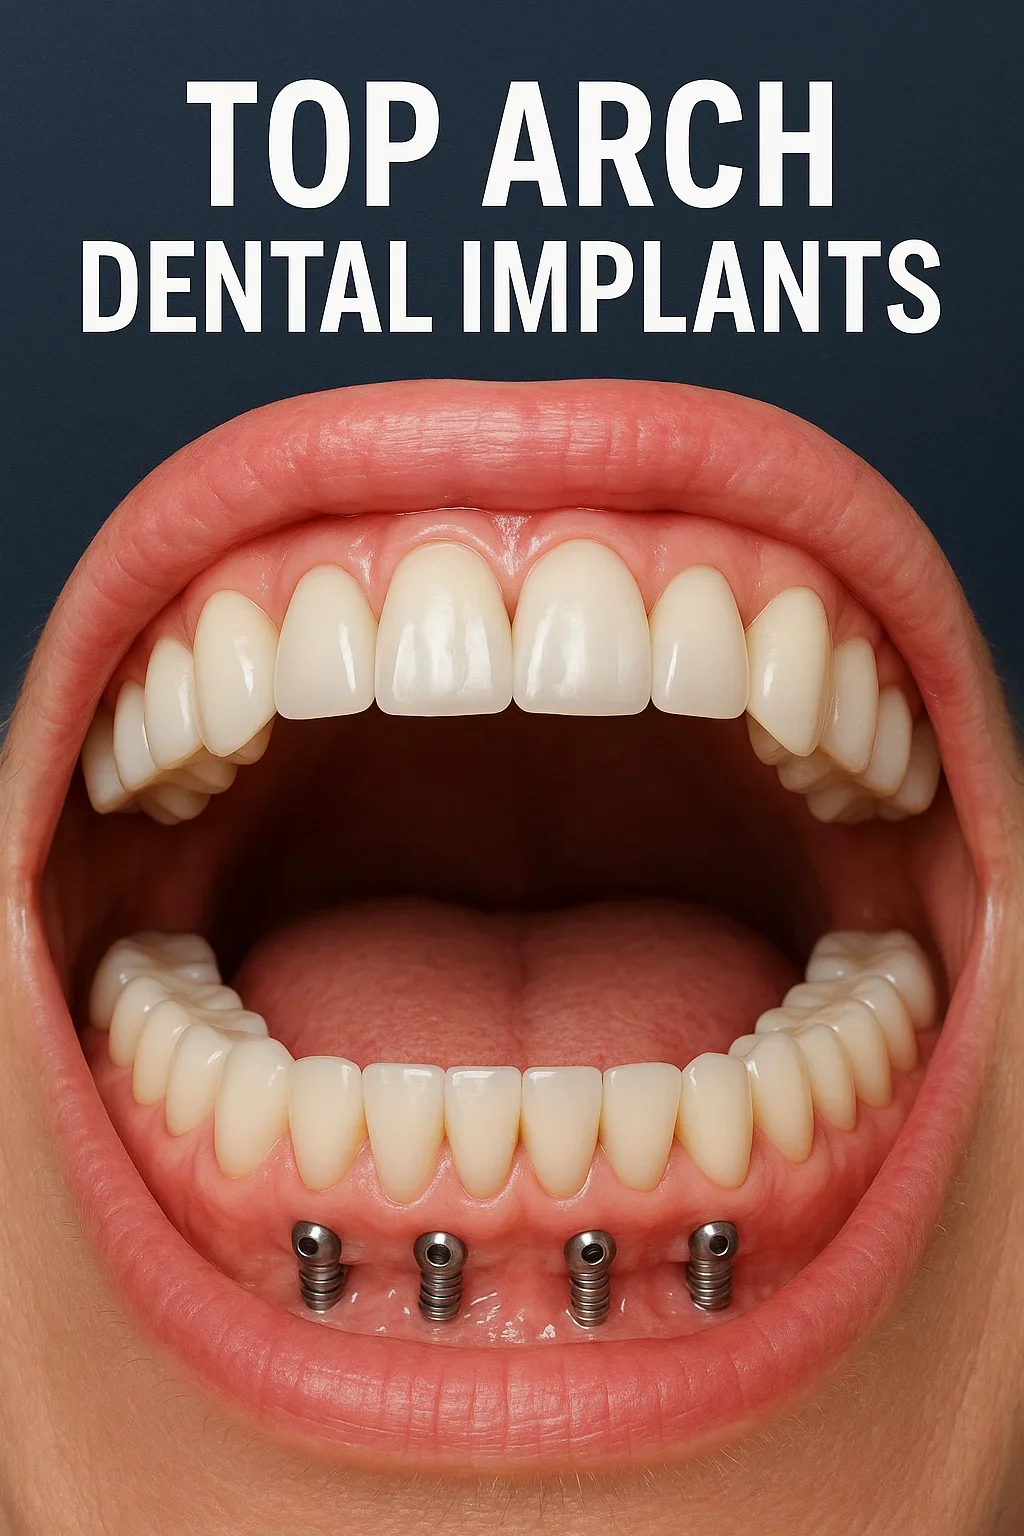
Top Arch Dental Implants Costs, Treatment Expenses, and Updated Fee Guidelines
Understanding the Full Cost Structure of a Complete Upper Arch Implant Restoration
When planning for top arch dental implants, one of the most common questions patients ask is:
“How much will the entire treatment cost?”
Because this procedure involves replacing all the teeth in the upper jaw with a custom implant-supported prosthesis, several factors influence the final price. Understanding each cost component helps patients make informed decisions and prepare financially for long-term oral health improvements.
This section provides a detailed, transparent look at the expenses involved, including implant placement, surgical procedures, prosthetic materials, diagnostic imaging, and follow-up care. It also reflects updated pricing guidelines based on the most recent official fee schedule published by the Turkish Dental Association (TDB).
Key Factors That Influence Top Arch Dental Implants Pricing
A full upper arch restoration is a comprehensive, multi-stage treatment. Total cost varies depending on several clinical and technical factors:
- Number of implants placed (4, 6, or more depending on bone quality)
- Implant brand and quality (premium titanium systems have higher longevity)
- Temporary prosthesis fabrication (immediate same-day teeth)
- Final prosthetic material (zirconia, hybrid composite, PMMA)
- Need for bone grafting or sinus lifting
- Complexity of surgical planning including 3D imaging and digital guides
- Specialist expertise of the implant surgeon and prosthodontist
These variables determine the final cost, but even with fluctuations, top arch dental implants remain one of the most durable and cost-effective long-term solutions for full-mouth restoration.
Breakdown of Typical Cost Components
Patients often appreciate a detailed breakdown of how the total treatment fee is structured. Below are the most common components included in top arch implant pricing:
- Consultation and diagnostic imaging (CBCT scan, panoramic X-ray, digital impressions)
- Surgical phase (implant placement and related clinical procedures)
- Temporary prosthesis (immediate fixed upper teeth)
- Healing follow-ups and adjustments
- Final permanent prosthesis (zirconia or hybrid bridge design and installation)
- Maintenance visits during the first year
Each of these elements plays a vital role in the long-term success of top arch dental implants, and all are typically included in comprehensive treatment packages.
Updated Implant Pricing According to TDB (Official Reference)
Below is a price block referencing the most recent published guidelines from the
Türk Diş Hekimleri Birliği (TDB). These values reflect standard recommended rates but may vary between clinics based on expertise, materials, and technology used.
TDB 2024–2025 Güncel Rehber Fiyatları (Referans)
- Tek implant cerrahisi: 12.000 TL – 20.000 TL
- İmplant üstü porselen/zirconia protez: 8.000 TL – 18.000 TL
- Tam ark implant destekli protez (üst çene): 95.000 TL – 180.000 TL aralığında
- Sinüs lifting (gerekirse): 15.000 TL – 25.000 TL
- Kemik grefti (gerekirse): 6.000 TL – 12.000 TL
Kaynak: https://www.tdb.org.tr (Güncel implant ve protez ücret tarifesi)
Because top arch dental implants require 4–6 implants plus a full-arch prosthetic reconstruction, total costs are significantly influenced by material selection and any additional surgical needs. Zirconia prostheses, for example, are more expensive but offer superior aesthetics and durability.
Total Estimated Cost for Full Upper Arch Implant Treatment
Based on national price ranges and clinical averages, patients can expect the following approximate totals:
- All-on-4 upper arch restoration: ~95.000 – 130.000 TL
- All-on-6 upper arch restoration: ~110.000 – 160.000 TL
- Zirconia final prosthesis upgrade: +20.000 – 40.000 TL
These values represent typical treatment packages in Turkey but may vary depending on clinic location, implant brand, digital workflow, and prosthetic laboratory collaboration.
Remember: choosing a high-quality system significantly improves long-term performance and lowers the risk of costly revisions.
Long-Term Value: Why Top Arch Dental Implants Are a Worthwhile Investment
Although the initial cost may seem high, patients often find that top arch dental implants provide tremendous long-term value by:
- Eliminating the need for repeated denture replacements
- Improving chewing power and digestive health
- Restoring confidence with a stable, natural-looking smile
- Preserving jawbone health and preventing bone loss
- Providing decades of durability with proper care
In contrast, removable dentures require frequent relining, replacements, and adjustments—costs that accumulate significantly over 10–20 years. Implants eliminate most of these recurring expenses.
Is Financing or Payment Planning Available?
Many clinics now offer installment plans or staged payments to make top arch dental implants more accessible. These financing options help patients begin treatment without paying the entire cost upfront.
Internal and External Resources
To request personalized pricing or schedule a consultation, visit
Redent Klinik Contact Page.
For official nationwide dental pricing policies, see the published fee schedules at
Türk Diş Hekimleri Birliği.
Understanding the financial aspects of top arch dental implants helps patients make well-informed decisions about treatment. With transparent pricing, detailed evaluations, and proper planning, you can confidently invest in a long-lasting, life-changing upper arch restoration that enhances your smile, comfort, and overall quality of life. 🌟