
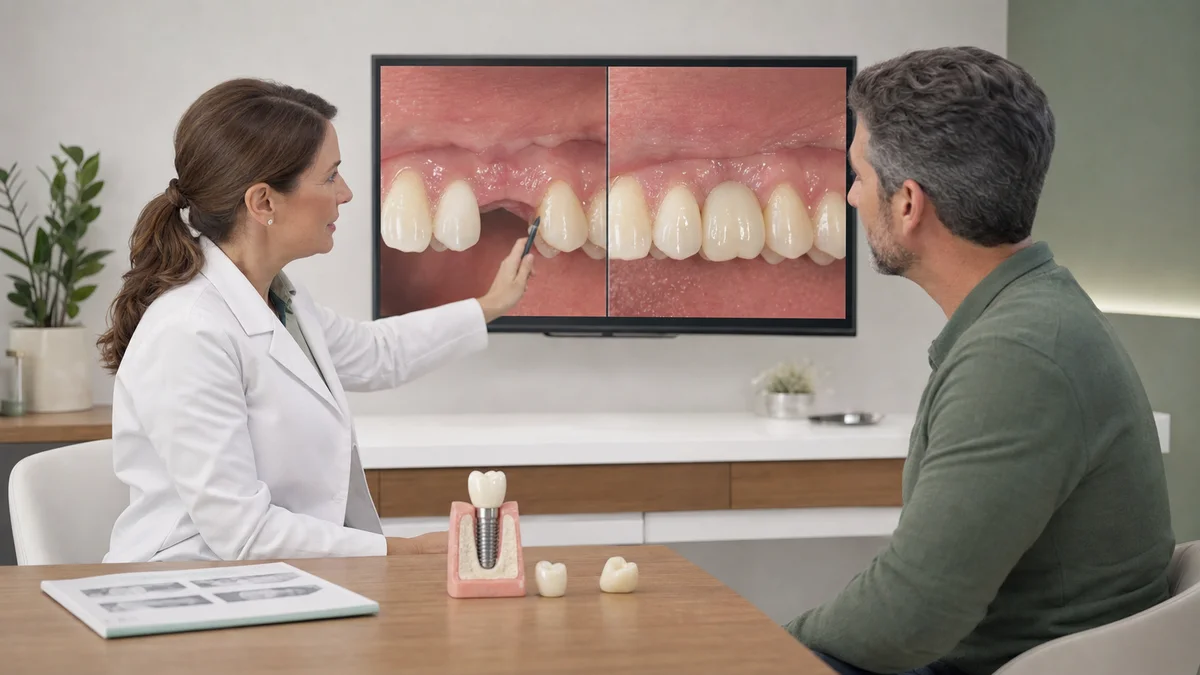
Searching dental implants before and after often produces two polished photographs placed side by side. That format can be useful for discussing shape, missing-tooth replacement and broad aesthetic goals, but it cannot show whether an implant integrated with bone, whether the gums are healthy, how the bite feels, or how the restoration performs years later. A responsible comparison needs dates, treatment stages and clinical context.
A dental implant restoration is also more than one object. The implant body is placed in the jaw, an abutment connects to it, and a crown, bridge or denture replaces the visible teeth. Bone or soft-tissue procedures, provisional restorations and laboratory stages may be involved. The United States Food and Drug Administration specifically separates these implant-system components and advises patients to retain the brand and model information.
This guide explains what meaningful before-and-after documentation should include, what changes are normal at different stages and which warning signs deserve professional review. It does not diagnose individual photographs, guarantee a result or promise a fixed treatment time. Health, anatomy, smoking, gum disease, medications, bite and the complexity of the prosthesis can change the plan.
Dental Implants Before and After Starts With the Diagnosis
A useful “before” record begins with the reason a tooth is missing or cannot be retained. Causes may include decay, fracture, periodontal disease, trauma or a failed previous restoration. The remaining teeth, gums and bite must be assessed rather than treating the empty space in isolation. If active infection or uncontrolled gum disease is present, stabilization may come before implant placement.
General health influences candidacy and healing. The FDA notes that overall health affects whether a person is a suitable candidate, how long healing may take and how long the implant may remain in place. Smoking can delay healing, while uncontrolled diabetes and local infection can increase concerns. Age alone is usually less informative than health, bone, hygiene and the ability to attend follow-up.
Baseline documentation for dental implants before and after may include standardized facial and intraoral photographs, periodontal measurements, tooth mobility, bite records, study models or scans, and appropriate radiographs. Three-dimensional imaging is not automatically necessary for every photograph or every patient; it should answer a clinical question about anatomy, bone, nearby structures or surgical planning.
- Medical history: diagnoses, allergies, tobacco use and all prescribed or nonprescribed medicines.
- Dental history: reason for tooth loss, gum disease, previous root treatment, fractures and prior implants.
- Clinical examination: soft tissues, bone contour, neighboring teeth, space, smile line and occlusion.
- Imaging: selected according to the site, surgical question and existing records.
- Alternatives: bridge, removable prosthesis, orthodontic space management or no replacement when clinically reasonable.
What Before-and-After Photos Can and Cannot Prove
Photos can document visible tooth position, color, contour, gum level and broad symmetry when they use similar lighting, camera angle, magnification and lip position. They can help a patient and dental team communicate. They are less reliable when one image is a close-up and the other is a full smile, when the “after” uses different lighting or editing, or when whitening and unrelated restorations are mixed into the comparison.
Dental implants before and after photographs cannot prove osseointegration. Bone integration is evaluated clinically and, when indicated, radiographically. A bright white crown may photograph well but still have poor contacts, an incorrect bite or a contour that is difficult to clean. Conversely, a conservative restoration with a natural shade may be healthier even if it looks less dramatic online.
Ask when the after photo was taken. A same-day image may show a provisional restoration immediately after surgery. A later image may show the final crown after tissue maturation. Neither establishes long-term success by itself. Meaningful follow-up includes absence of concerning symptoms, stable tissues, cleanability, prosthetic integrity and appropriate clinical monitoring.
Patient images also require valid permission and privacy protection. Consent to treatment is different from consent to use photographs in marketing. A patient should understand where images will appear and should not be pressured to agree. If you are comparing published cases, remember that selected photographs may not represent the full range of outcomes.
The Six Stages Between “Before” and “After”
The American Dental Association’s patient information describes three broad phases: surgical implant placement, healing through osseointegration and attachment of the artificial tooth. In practice, dental implants before and after may include more checkpoints because disease control, site development and provisional teeth can each change the visible appearance.
- Assessment and treatment goal: determine whether the tooth can be saved and what replacement is appropriate.
- Site preparation: manage infection, extraction, gum disease and any justified bone or soft-tissue procedure.
- Implant placement: place the implant in a prosthetically planned position while protecting nearby anatomy.
- Healing and integration: allow tissues and bone to heal; loading may be immediate, early or delayed according to stability and risk.
- Provisional restoration: support appearance or function while respecting healing conditions.
- Final prosthesis and maintenance: deliver the crown, bridge or denture, check bite and cleanability, then monitor it over time.
Not every patient follows the same sequence. An extraction socket may permit immediate implant placement, while another site needs healing first. A graft may occur before, during or occasionally after implant placement depending on the indication. A staged plan is not automatically inferior; it may be the safer response to anatomy or infection.
Decision Table: What Each “After” Stage Actually Means
| Stage shown | What may be visible | What it can suggest | What it does not prove |
|---|---|---|---|
| Immediately after surgery | Swelling, sutures, healing cap or temporary tooth | Surgical access and provisional design | Bone integration or final tissue level |
| Early healing | Reduced swelling, changing gum contour | Wound progression at that visit | Permanent implant stability |
| Provisional restoration | Temporary crown, bridge or denture | Interim appearance and function | Final material, fit or longevity |
| Final crown delivery | Final contour, shade and contacts | Prosthetic result at delivery | Future tissue health or maintenance |
| One-year review | Mature tissues and used restoration | Short-term function and hygiene response | Lifetime performance |
| Long-term review | Wear, tissue level and repairs | Real-world maintenance history | Same outcome for another patient |
Immediate Implant and Same-Day Teeth: Three Different Claims
“Immediate implant,” “immediate loading” and “same-day teeth” are not interchangeable. Immediate placement means the implant is inserted at the extraction appointment. Immediate loading means a restoration is connected within a short period. Same-day teeth may refer to a temporary fixed bridge or crown rather than the definitive prosthesis. A marketing image may not make these distinctions visible.
For dental implants before and after, ask whether the pictured tooth is provisional or final and whether it is in functional contact. Immediate restoration may be considered when primary stability, bone, bite, implant distribution and patient factors are suitable. If these conditions are not met, a removable provisional or an unloaded healing period may be safer.
A same-day provisional is often designed to protect healing and guide tissue contour. Its material, shape and contacts may intentionally differ from the final restoration. Patients may receive dietary restrictions and hygiene instructions. Breaking or loosening a provisional needs prompt assessment; it should not be repaired with household adhesive.
Normal Early Changes Versus Warning Signs
Early photographs may show swelling, bruising, redness, sutures or a temporary asymmetry. Guy’s and St Thomas’ NHS Foundation Trust notes that soreness, swelling, bleeding or bruising can occur after implant placement and provides individualized instructions. The degree and duration vary, so a photograph alone should not be used to prescribe care.
Follow the treating team’s written directions for oral hygiene, food, medication and activity. Do not copy another patient’s antibiotic, mouthwash or pain-relief plan. Medical conditions, allergies and drug interactions differ. If sedation was used, escort, driving and recovery instructions may also apply.
Contact the dental team for worsening rather than improving pain, uncontrolled bleeding, fever, pus, spreading swelling, new persistent numbness, a loose implant component, an abnormal bite or difficulty breathing or swallowing. Emergency symptoms require urgent local care. The FDA advises patients to report an implant that feels loose or painful to their dental provider promptly.
- Keep emergency and out-of-hours contact details before leaving the clinic.
- Know whether a visible component is an implant, healing abutment or provisional tooth.
- Photograph a concern for communication, but do not rely on a photo instead of examination.
- Do not stop prescribed medicines without the prescribing clinician’s guidance.
- Attend the scheduled wound and prosthetic reviews even if the area feels comfortable.
Single-Tooth Dental Implants Before and After
A single-tooth case is often the clearest visual comparison: one gap becomes one implant-supported crown. Yet the hidden goals remain important. The implant should be positioned to support the planned crown, avoid neighboring roots and allow healthy, cleanable tissues. The crown must contact adjacent teeth appropriately and fit the bite without overload.
In the aesthetic zone, gum architecture and bone contour can make the timeline less predictable. Tissue grafting or provisional contouring may be considered, but neither should be automatic. The final crown shade is matched to neighboring teeth at a specific time. If tooth whitening is planned, its sequence should be discussed because an implant crown will not whiten like natural enamel.
Dental implants before and after for a single front tooth should be photographed from comparable angles and include the gum margin, not only the crown. A natural result does not necessarily mean perfect mirror symmetry. Pre-existing bone loss, gum recession, tooth shape and smile line can limit what is biologically achievable.
Multiple Teeth and Full-Arch Results Need More Context
Several missing teeth do not always require one implant per tooth. An implant-supported bridge may replace multiple teeth, provided the number, distribution and design are appropriate. A full-arch fixed prosthesis uses several implants to support an entire dental arch. The exact concept depends on anatomy, bone, opposing teeth, force, hygiene and restorative space.
Full-arch dental implants before and after images can be especially misleading when the “before” and “after” differ in lip posture, tooth display, vertical dimension, whitening and facial expression. Ask how many teeth were removed, whether any were maintainable, how many implants were placed, and whether the image shows a temporary or final bridge.
Removal of remaining teeth is irreversible and requires tooth-by-tooth prognosis. A full-arch package should not be selected merely because it is quicker to advertise or easier to price. Some patients benefit from preserving strategic teeth, staged care or a removable implant overdenture. Others may have a terminal dentition for which full-arch replacement is reasonable after informed assessment.
Bone Grafting and Gum Contouring Change the Timeline
Insufficient bone volume, anatomic defects or the desired implant position may lead to discussion of ridge preservation, augmentation or sinus-related procedures. These procedures are not needed in every implant case. Their purpose, material, timing, alternatives and additional risks should be explained. Imaging should support the decision rather than function as a sales illustration.
Soft-tissue procedures may aim to improve tissue thickness, cover a defect or make plaque control easier. Gum shape also evolves during healing and with provisional restorations. A very early “after” image cannot predict the mature contour. Even well-planned tissue can remodel, and patient-specific limits remain.
For dental implants before and after involving grafts, request a dated sequence: initial defect, graft stage, healed site, implant stage, provisional and final prosthesis. This makes the treatment burden visible and prevents a complex multi-stage result from being presented as a single appointment.
How to Judge the Final Crown or Bridge
The final restoration should be assessed beyond color. Shape, length, surface texture, gum transition, speech, bite, contacts and cleanability all matter. A crown that looks attractive from the front may be too bulky on the tongue or cheek side, trap plaque or create excessive force. The patient should receive instructions and demonstrate access for daily cleaning.
A final restoration can be screw-retained or cement-retained according to the plan. Each design has technical considerations. Patients should know how the prosthesis is attached, what components were used and who to contact if it loosens. Keep the implant brand, model and site record because future clinicians may need compatible parts.
Dental implants before and after documentation at delivery should ideally include the agreed clinical images and records, not just a social-media crop. Ask for copies of relevant radiographs, the implant record, restorative material information and maintenance plan. These records are particularly important if follow-up will occur in another country.
Long-Term “After” Means Maintenance, Not Completion
An implant cannot decay, but the surrounding tissues can become inflamed and supporting bone can be lost. The American Academy of Periodontology describes peri-implant mucositis as soft-tissue inflammation and peri-implantitis as inflammation with deterioration of supporting bone. Red or tender gums and bleeding during cleaning are warning signs that deserve assessment.
The AAP and FDA both emphasize home hygiene and regular professional review. The maintenance interval should be based on risk, previous periodontal disease, plaque control, smoking, diabetes, prosthesis design and clinical findings. A full-arch fixed bridge may require different tools and professional access than a single crown.
Long-term dental implants before and after should therefore include tissue health, bite, prosthetic condition and radiographic findings when indicated. A ten-year image with no maintenance history is incomplete evidence. Screws, crowns or dentures may need adjustment, repair or replacement even when the implant body remains integrated.
Comparing Treatment in Turkey With Local Care
Patients considering care abroad should compare the same clinical scope. A low headline fee may include the implant body but exclude the abutment, temporary tooth, final crown, graft, sedation, travel or return visits. Ask for a line-item plan and conditions under which it can change after examination. Avoid assuming that a package title defines the diagnosis.
Redent Klinik’s English-language dental care page describes the treatment setting for international patients. Existing scans, photographs and questions can be sent through the English contact page. Remote review is preliminary; the final plan can change after clinical examination and appropriate imaging.
When evaluating dental implants before and after from Turkey or any destination, ask who performed surgery, who designed the prosthesis, whether the facility is appropriately authorized, how records will be supplied and who handles complications after you return home. Travel time should never force a final restoration before tissues and clinical conditions are ready.
Arrange continuity with a local dentist before travel when possible. Another clinician may charge for examination, may not stock the same components and may not accept a foreign clinic’s commercial warranty. Include potential return travel and local maintenance in the total plan.
Red Flags in Before-and-After Marketing
Strong visual results can be genuine, but presentation matters. Be cautious when dental implants before and after images omit dates, show only one selected angle, use obvious color or lighting changes, hide the gum line, or describe a provisional restoration as the final result. A photograph cannot establish pain level, bite, bone health or informed consent.
- A lifetime outcome is promised from a same-day photograph.
- Many teeth are scheduled for extraction without individual prognosis.
- The implant brand, model or traceability record is withheld.
- The final prosthetic material and temporary stage are not distinguished.
- Complication management and maintenance are absent from the plan.
- Every patient is offered the same implant number or timeline.
- Payment urgency replaces informed clinical discussion.
- Image consent is bundled with treatment and cannot be freely declined.
A second opinion is reasonable before removing multiple teeth, undergoing major grafting, accepting immediate full-arch loading or choosing between conflicting diagnoses. Share existing images to reduce unnecessary repetition, while allowing the second clinician to request justified records that answer a different clinical question.
Questions to Ask Before You Approve Treatment
Use these questions to turn dental implants before and after from a photo gallery into an informed clinical plan:
- Which teeth can be predictably retained, and why is extraction recommended?
- What alternatives exist, including bridge, removable prosthesis or no treatment?
- Are gum disease, decay and infection controlled before surgery?
- What implant brand, model, dimensions and components are planned?
- Is grafting definite, conditional or avoidable with another option?
- Will the visible tooth be temporary or final at each visit?
- What findings permit immediate placement or loading?
- How many visits and healing checkpoints are expected?
- How will bite, speech, shade, contour and cleanability be tested?
- Which records will I receive at completion?
- Who provides emergency care and long-term maintenance?
- What does the commercial warranty include and exclude?
Frequently Asked Questions
How long between dental implants before and after photos?
There is no universal interval. An immediate image may show sutures or a provisional tooth, while the final restoration may follow after integration and tissue healing. Grafting and full-arch treatment can add stages. Always ask for the date and whether the pictured restoration is temporary or final.
Can I get a dental implant and final tooth in one day?
Selected patients may receive an implant and an immediate provisional restoration when stability, bone, bite and risk allow. The same-day tooth is often temporary. A definitive crown or bridge may be delivered later after healing and prosthetic verification. Same-day treatment is not suitable for every site.
What does a dental implant look like right after surgery?
You may see sutures, a healing cap, a temporary tooth or a covered healing site. Swelling, bruising or mild bleeding can occur. Follow the treating team’s instructions and report worsening pain, uncontrolled bleeding, fever, pus, persistent numbness or a loose component promptly.
Can a photo prove that an implant succeeded?
No. A photograph can document visible appearance but cannot prove osseointegration, healthy supporting bone, correct bite or absence of disease. Success is assessed through history, examination, prosthetic function and appropriate imaging over time.
Why do gums look different after the final crown?
Extraction, bone shape, tissue thickness, surgical healing and provisional contours can change the gum margin. Tissues may continue to mature after delivery. Grafting or contouring may help selected cases, but perfect symmetry cannot be guaranteed.
Do dental implant crowns stay white forever?
Restorative materials do not whiten like natural enamel, though surface staining and wear may occur. Natural neighboring teeth can change color. Plan tooth whitening before final shade selection when appropriate, and ask how the crown material should be professionally maintained.
Can smoking change the after result?
Yes. FDA and ADA patient guidance note that smoking can impair healing and reduce long-term success. It is also a risk factor for peri-implant disease. Discuss cessation support before treatment; do not assume a short pause removes all risk.
What records should I receive after implant treatment?
Request the implant brand, model, site and component record, relevant radiographs, surgical summary, restorative material details and maintenance instructions. For overseas care, obtain the records in a form that your local dental team can use.
How often should dental implants be checked?
The interval is individualized according to gum history, plaque control, smoking, diabetes, prosthesis design and findings. Regular professional review and daily cleaning are essential. Bleeding, tenderness, swelling, pus, looseness or bite change should not wait for a routine visit.
Conclusion: Look Beyond the Transformation Image
The most useful dental implants before and after comparison shows diagnosis, treatment stages, dates, temporary versus final teeth, tissue health and maintenance. A visually appealing final crown matters, but it is only one part of a successful outcome. Function, cleanability, stable tissues, traceable components and a realistic follow-up plan are equally important.
Choose treatment after a complete examination and a discussion of alternatives, risks, uncertainty and total scope. Keep your implant records, attend follow-up and seek prompt review for warning signs. No photo can guarantee that another patient will have the same anatomy, healing or result; a personalized plan remains the safer standard.
Official Sources and Clinical References
- U.S. Food and Drug Administration: Dental Implants — What You Should Know.
- American Dental Association MouthHealthy: Dental Implants.
- Guy’s and St Thomas’ NHS Foundation Trust: After Having a Dental Implant — reviewed December 2024.
- American Academy of Periodontology: Dental Implant Procedures and Follow-Up.
- American Academy of Periodontology: Peri-Implant Diseases.
- American Dental Association.
- World Health Organization oral health fact sheet.
Clinical sources reviewed July 13, 2026. Individual anatomy, health, product labeling and treatment protocols vary; follow your treating team’s current instructions.
Disclosure: this page may contain affiliate links. We may earn a commission if you use them, at no extra cost to you.